



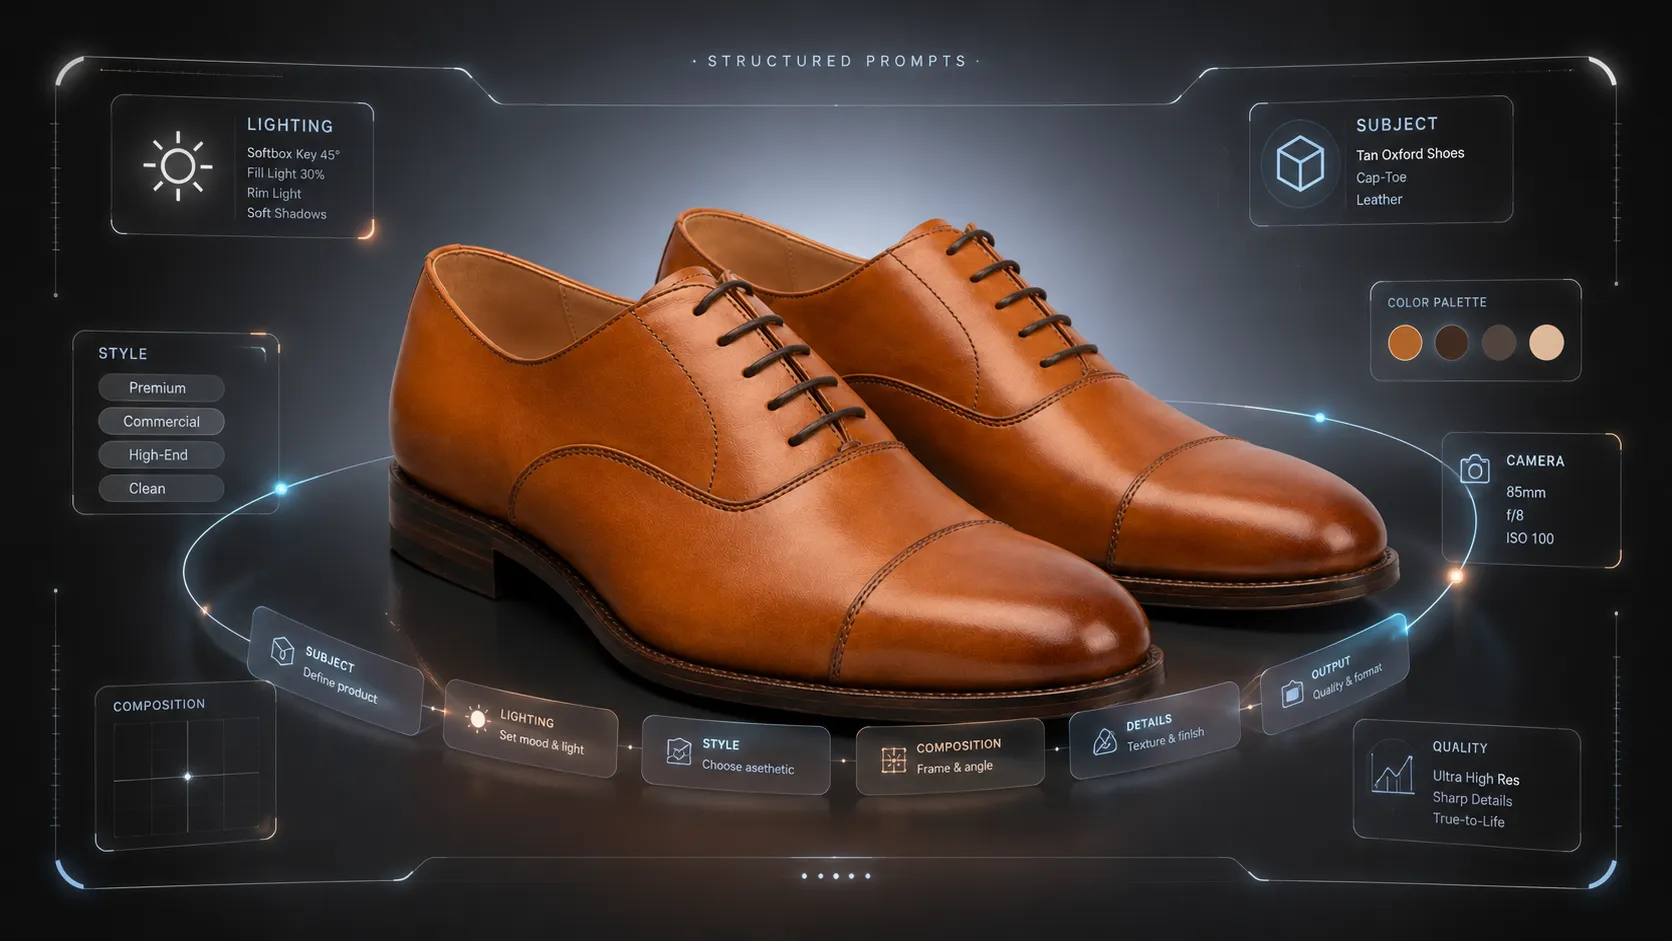
Structured prompts turn AI product photography from a guessing game into a controllable workflow. Most people write prompts by feel. They type something like "a sneaker on white background" and get back distorted shoes, wrong angles, or output that looks more like CG than a photograph. The output quality is unpredictable because the input instructions are vague.
This guide adapts two proven frameworks (OpenAI's official Prompting Fundamentals and a community-driven 6-module structure) specifically for ecommerce product photography. You will get a diagnostic checklist, three copy-paste templates, and a decision tree for when to use each quality setting.
Key Takeaways
- Structured prompts follow a consistent order: canvas → subject → style → lighting → text → constraints. This makes debugging easier because you know exactly which module caused the problem.
- Generic frameworks work for creative ads but need modification for product photography: replace "visual metaphor" with "category aesthetics" and "canvas" with "platform specs."
- The same product can generate multiple background variations using a color-matrix prompt structure — useful for social content, A/B testing, and seasonal campaigns.
- Use `quality: low` for speed (social previews, batch variations), `medium` for balanced output, and `high` for detail-critical assets like white-background hero images.
Why Your Product Prompts Fail (And How to Fix Them)
Before building the framework, look at the most common failure patterns in AI product photography. Each one maps to a specific module in the framework below.
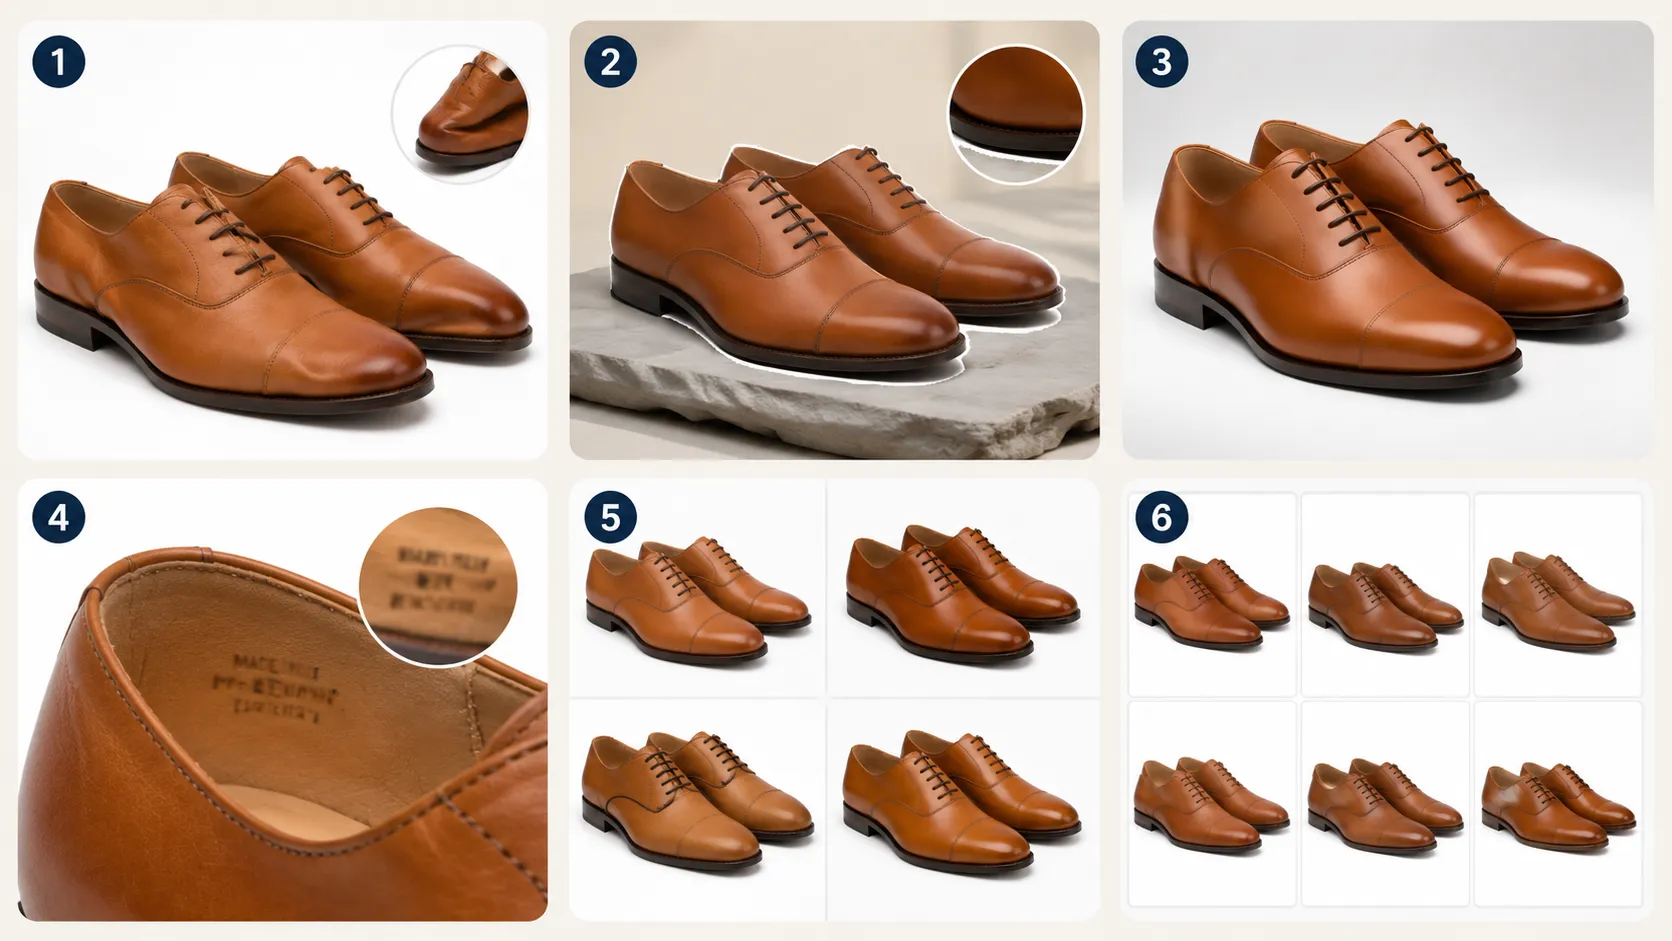
Product looks deformed or distorted. The model did not receive enough information about geometry, proportions, or key details. This is almost always a Module 2 issue (Subject & Positioning) problem.
Background doesn't blend naturally. The product looks pasted onto the scene rather than sitting inside it. This usually means Module 4 (Lighting & Environment) is missing or conflicting with Module 2.
Output looks like CGI, not photography. The prompt lacks photorealism cues, material texture specs, or camera settings. This is a Module 3 (Style & Category Aesthetics) gap.
Text, logos, or labels are blurry or wrong. Either the quality setting is too low for text rendering, or Module 5 (Text & Brand Elements) does not specify typography constraints precisely enough.
Every generation looks different. There is no constraint list preserving consistency across outputs. This is a Module 6 (Constraints & Exclusions) omission.
You regenerate 10 times and still don't like any result. The base prompt itself has structural problems that iteration won't fix. Go back to Module 1 and restructure.
The pattern should be clear: most failures come from missing or misaligned modules, not from the model being "bad." Now let's build the framework.
The 6-Module Framework: From Generic to Product Photography
This framework combines OpenAI's 10 Prompting Fundamentals with a community-driven 6-module structure. Each module has been adapted for ecommerce product photography use cases.
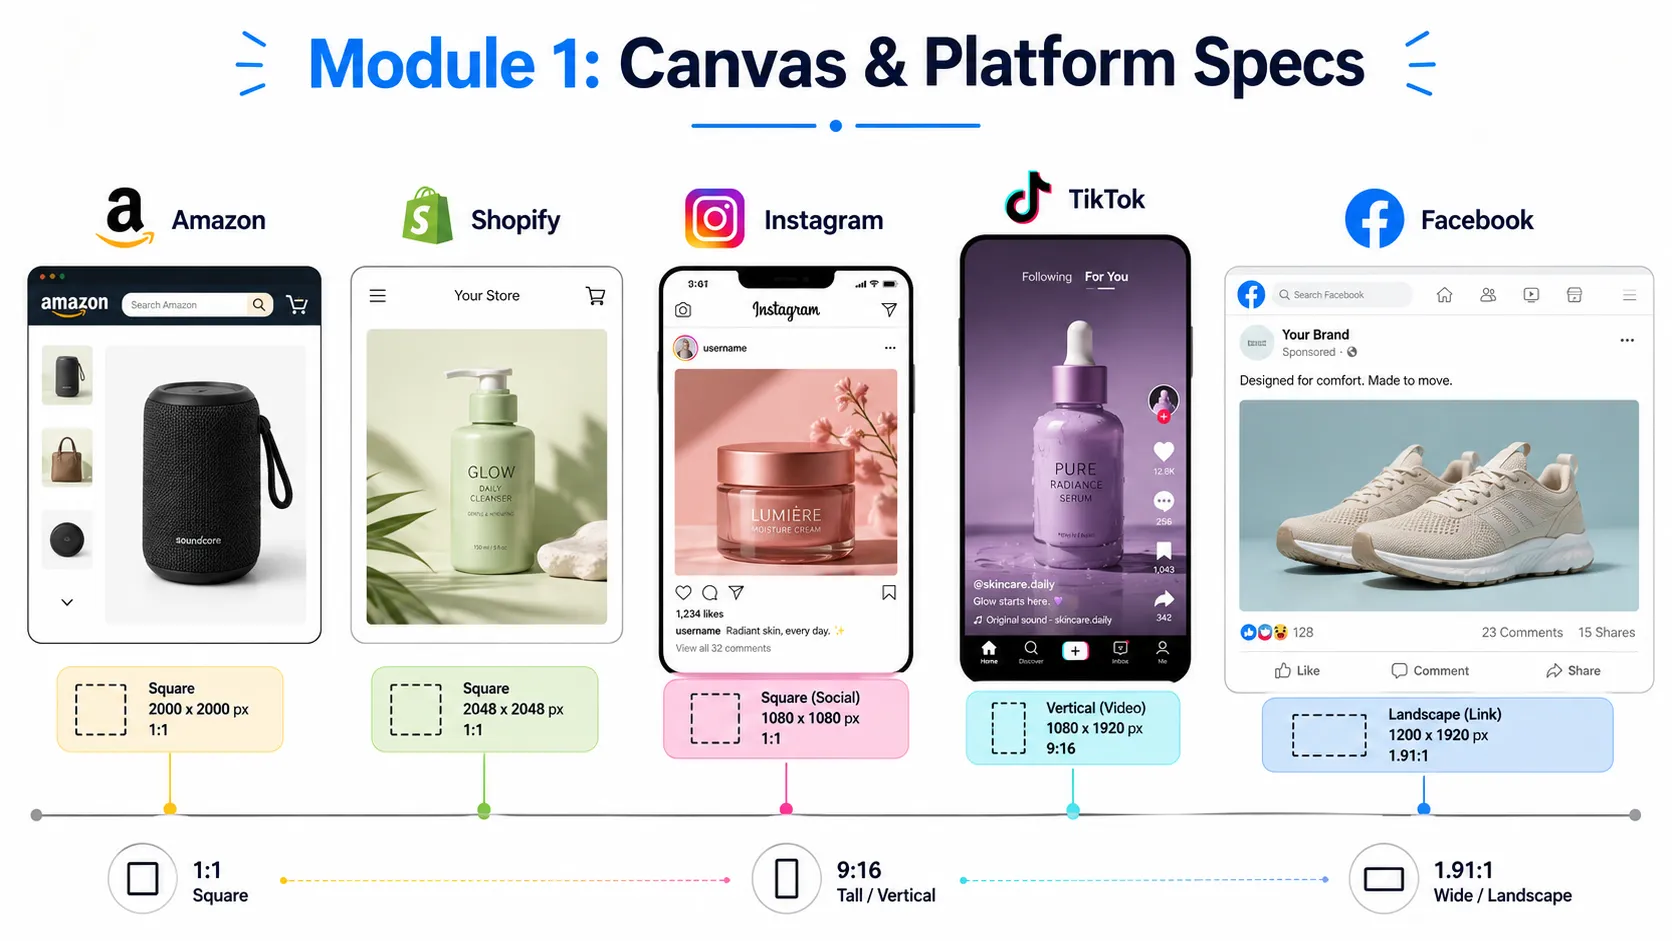
Module 1: Canvas & Platform Specs
Generic version: Define aspect ratio and use case (16:9 ad, 1:1 social, etc.)
Product photography version: Match your output to the platform where the image will be used. Different ecommerce platforms and placements have different requirements, and getting this wrong means your image gets rejected or resized badly.
| Platform | Recommended Size | Use Case | Notes |
|---|---|---|---|
| Amazon main image | 2000 × 2000px | PDP hero | Pure white or lifestyle context |
| Shopify product page | 2048 × 2048px (square) | PDP gallery | Supports transparent PNG |
| Instagram feed | 1080 × 1080px | Social content | Square format, mobile-first |
| TikTok / Reels | 1080 × 1920px | Short video cover / social | Vertical, fullscreen |
| Facebook catalog | 1200 × 630px | Ad creative | Wide landscape |
How to write it in a prompt: ``` Generate a [product description] image in [aspect ratio] format, suitable for [platform name] [use case]. ```
Example: ``` Generate a white-background product image of leather Oxford shoes in 2048×2048 square format, suitable for a Shopify product detail page. ```
Module 2: Subject & Positioning
Generic version: Describe the subject, its position in frame, and how much space it occupies.
Product photography version: Specify product angle, visible proportions, camera viewpoint, and which details must remain visible. This is where most product prompts fail or succeed.
Key parameters to include:
- Angle: 45° for footwear (shows depth), 90° flat-lay for apparel (shows full design), eye-level for lifestyle shots
- Occupies: 40-60% of frame for hero products, less for context-heavy lifestyle shots
- Visible details: collar, logo placement, fabric texture, sole pattern, zipper pulls, label area
- Camera level: Eye-level for lifestyle, top-down for flat-lays, slightly above for footwear
How to write it: ``` [Product] positioned at [angle], occupying approximately [%] of the frame. Camera at [viewpoint]. Visible details include [specific product features]. ```
Example: ``` A pair of tan leather Oxford shoes positioned at a 45-degree angle, occupying about 50% of the frame. Camera at slightly above eye level. Visible details include the lace-up closure, stitching along the cap toe, and the brand embossing on the tongue label. ```
Module 3: Style & Category Aesthetics ← Core Differentiation Module
Generic version: Describe visual style ("Apple style," "cinematic," "watercolor").
Product photography version: Replace vague style references with category-specific aesthetic vocabulary. Each product category has different visual language that signals quality to buyers.
This is where generic frameworks stop being useful and product-specific ones take over.
Category aesthetics dictionary:
| Category | Key Visual Words | Avoid |
|---|---|---|
| Footwear | Grain, stitching, rubber sole texture, lacing, last shape, wear marks | "shiny," "perfect," "cartoonish" |
| Apparel (tops) | Drape, fold lines, fabric weight, hem drop, button alignment, print clarity | "flat-looking," "plastic" |
| Bags | Hardware, strap thickness, zipper teeth, compartment structure, leather grain | "soft toy-like" |
| Perfume / Cosmetics | Glass reflectivity, liquid transparency, bottle contour, cap finish, label legibility | "blurry," "illustration-style" |
| Accessories | Metal clasp, link chain gauge, gemstone facet, engraving depth | "toy-like" |
How to describe "premium" without hype words: Instead of "ultra-premium luxury quality," use: "commercial photography style with accurate material texture, soft studio lighting, shallow depth of field, and natural color balance."
How to write it: ``` [Commercial photography style] with [material-specific textures]. [Aesthetic quality words] without over-polishing. Visual reference: [comparable brand or style direction]. ```
Example: ``` Commercial photography style with visible leather grain, accurate stitching texture, and subtle surface wear that looks like a real photograph, not a render. Soft studio lighting, shallow depth of field, neutral color balance. Visual reference: Mr Porter or similar heritage footwear brand photography. ```
Module 4: Lighting & Environment
Generic version: Mention lighting mood and setting.
Product photography version: Lighting is not optional decoration. It determines whether the product looks sellable or flat. Different product types need different lighting approaches, and white-background images have their own rules.
Three lighting modes for product photography:
| Mode | When to Use | Prompt Formula |
|---|---|---|
| Studio white bg | Amazon/Shopify hero images, catalog shots | `"Pure white (#FFFFFF) background. Softbox setup, 3-point lighting, minimal shadows. Even illumination, no colored cast."` |
| Lifestyle ambient | Social content, campaign visuals, lookbooks | `"Warm indoor ambient lighting, window light from upper left, subtle contact shadow beneath the product. Lifestyle interior background, softly blurred."` |
| Editorial/dramatic | Campaign hero, seasonal launches | `"Golden hour side lighting, long shadow cast to the right, warm color temperature around 4500K-5000K. Outdoor urban or natural setting."` |
How to write it: ``` [Lighting mode specification]. [Shadow behavior]. [Background description if applicable]. Color temperature: [approximate Kelvin or mood word]. ```
Module 5: Text & Brand Elements
Generic version: Include text in quotes or ALL CAPS with font specifications.
Product photography version: Text in product images can add real commercial value or ruin the shot entirely. This module needs stricter rules than generic frameworks provide.
When to include text:
- Price badges or promotional tags for ad creatives
- Brand logos on lookbook or campaign images
- Label text for packaging or mockup previews
When to avoid text:
- White-background hero images for marketplaces (Amazon, Shopify PDPs often reject text-in-image)
- Images that will go through background removal tools
- Detail shots where text would overlap with product features
How to specify text: ``` [If including]: Include text "[EXACT COPY]" in [position]. Font: [style], size: [relative size], color: [hex if known]. Ensure text is crisp and legible, not overlapping with product features. [If excluding]: No text, no watermarks, no extra labels, no promotional overlays. ```
Module 6: Constraints & Exclusions
Generic version: List what to avoid.
Product photography version: This module prevents the most common ecommerce-specific failures. Be explicit about both what you want and what you must exclude.
Mandatory exclusions for every product prompt:
- No watermarks, no stock photo watermarks, no "sample" stamps
- No deformed geometry (extra fingers, twisted zippers, melted soles)
- No competing brand logos or trademarked elements unless intentional
- No extra objects that were not in the original brief
Positive constraints to consider:
- Preserve exact product geometry and proportions
- Maintain consistent aspect ratio across variations
- Keep brand colors accurate (if specified in Module 3)
- Output opaque background unless transparent PNG is explicitly needed
How to write it: ``` Constraints: [list of mandatory exclusions]. Preserve: [list of elements that must remain unchanged]. Output: [file format and background type]. ```
Example: ``` Constraints: No watermarks, no extra objects, no deformed shoe geometry, no competing brand elements. Preserve exact lacing pattern and sole shape. Output: JPEG, opaque white background. ```
Real-World Example 1: White Background Product Image
Here is a complete structured prompt using all six modules, written for an ecommerce footwear seller:
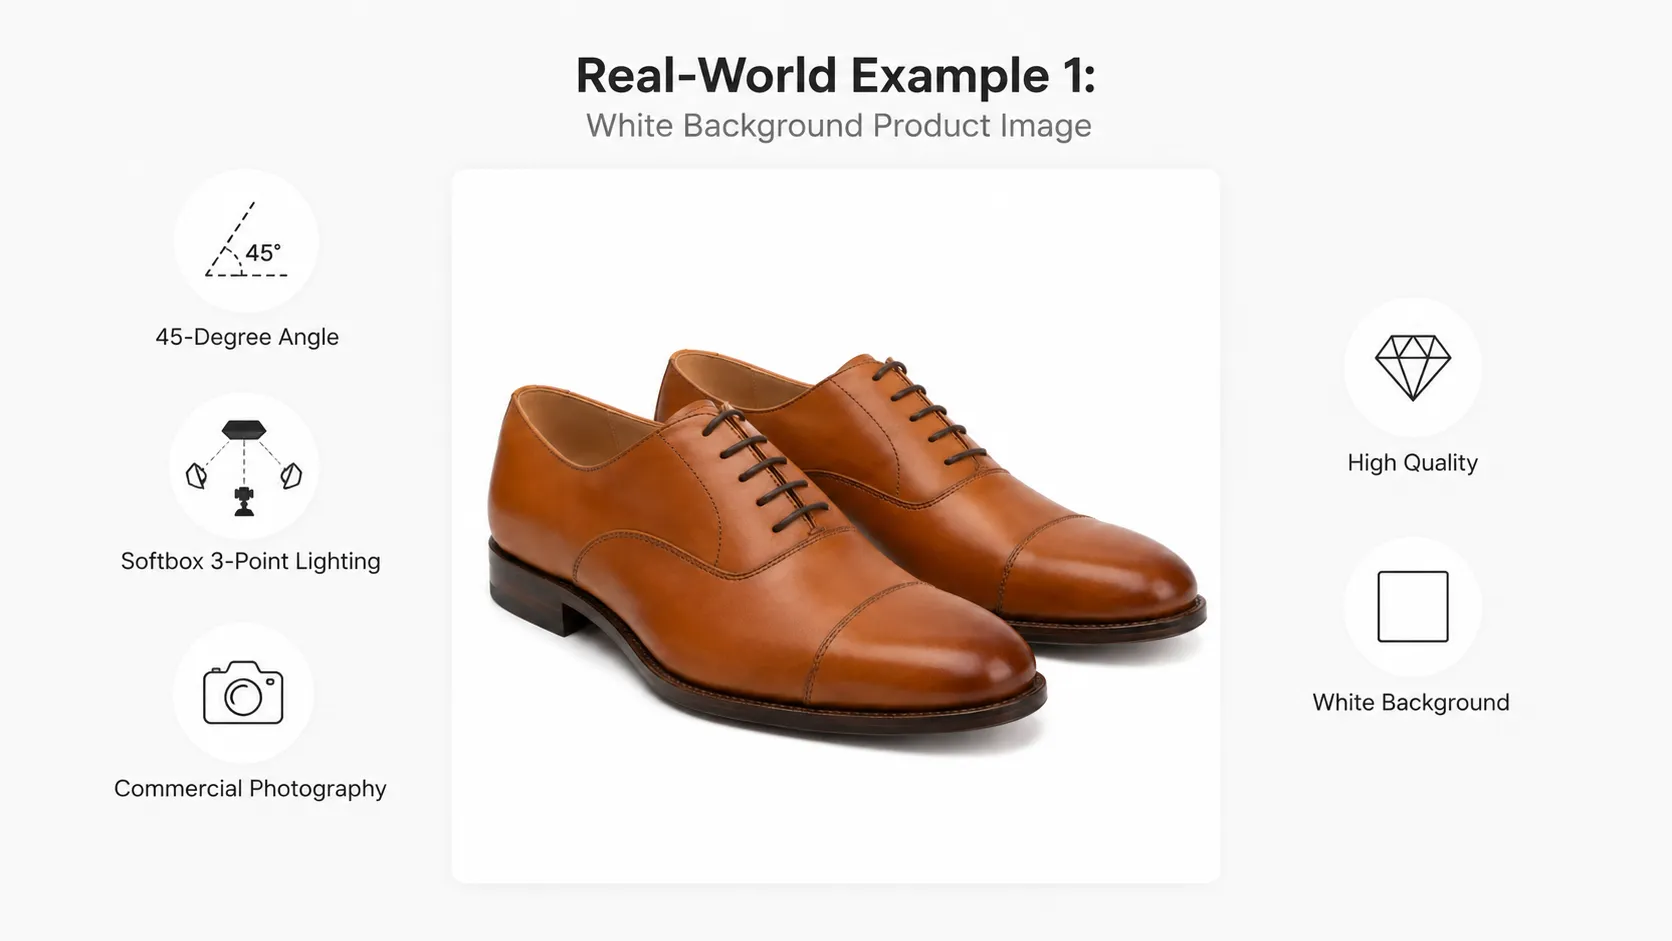
``` Generate a white-background product image in 2048×2048 square format, suitable for a Shopify product detail page.
A pair of tan leather Oxford shoes positioned at a 45-degree angle, occupying about 50% of the frame. Camera at slightly above eye level. Visible details include the lace-up closure, stitching along the cap toe, and the brand embossing on the tongue label.
Commercial photography style with visible leather grain, accurate stitching texture, and subtle surface wear that looks like a real photograph, not a render. Softbox setup, 3-point studio lighting, pure white (#FFFFFF) background. Even illumination, no colored cast, minimal contact shadow beneath the shoes.
No text, no watermarks, no extra objects, no deformed shoe geometry. Preserve exact lacing pattern and sole shape. Output: JPEG, opaque white background. quality: high ```
Why this works: Every module maps to a specific product photography requirement. If the output still fails, you know exactly which module to adjust. If the shoes come out at the wrong angle, edit Module 2. If the leather looks too smooth, add more texture words to Module 3. If there's a color cast on the white background, tighten Module 4.
Real-World Example 2: Lifestyle Context Shot
Same product, different goal. This time the target is Instagram social content:
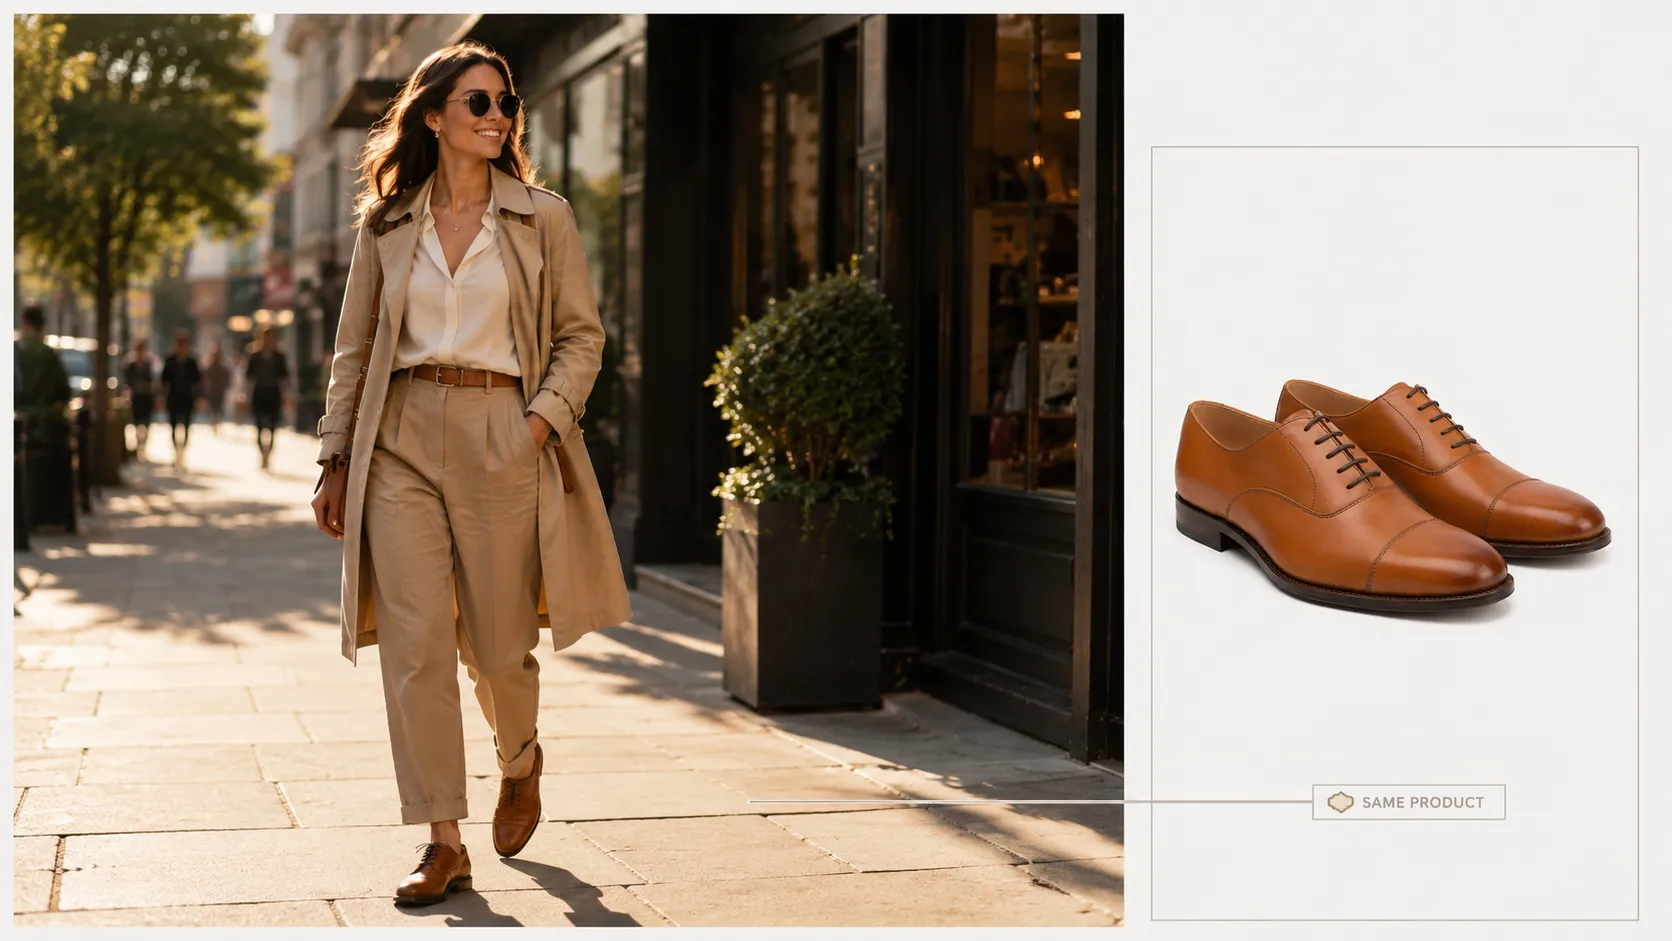
``` Generate a lifestyle product image in 1080×1080 square format, suitable for an Instagram feed post.
A young woman wearing the tan leather Oxfords walking through a sunlit city street. Full body visible, shoes occupy roughly 15% of the frame (lifestyle shot, not product-focused). Camera at eye level, natural walking pace moment.
Commercial editorial style with authentic streetwear vibe. Visible shoe details include the Oxford silhouette, lacing texture under natural daylight, and how the leather moves with foot flexion. Realistic fabric wrinkles on clothing, natural skin tone, candid body language.
Warm late-afternoon ambient lighting, directional sunlight from upper left, long shadow cast behind. Urban street background with storefront blur (bokeh), neutral building colors, no competing brand signage in frame.
No text, no watermarks, no overlays. Output: JPEG, lifestyle environmental background. quality: medium ```
Key difference from Example 1: Notice how Module 2 changed (15% → 50% frame for product vs lifestyle), Module 3 shifted from "heritage footwear" to "authentic streetwear," and Module 4 moved from studio lighting to golden-hour ambient. Same product, completely different prompt architecture, because the use case changed.
Real-World Example 3: Color Matrix Variation Set
This approach comes from a production technique demonstrated by AI creators on PixVerse: generate multiple background variations of the same product using a single structured prompt template. It is useful when a brand needs a complete set of social assets or A/B test materials.
``` Generate a 2×4 grid layout image containing 8 panels. Each panel shows the same [PRODUCT] against a different solid or gradient background color. Panel 1: [Color #1 name], Panel 2: [Color #2 name], ... through Panel 8: [Color #8 name].
In each panel: [brief product description, same positioning and angle across all panels]. Consistent commercial photography style, identical lighting setup across all panels, matching product category aesthetics. Clean studio composition in every panel, no text, no watermarks. Output: JPEG, individual panel extraction for social use. quality: medium ```
Concrete example (perfume bottle):
``` Generate a 2×4 grid layout image containing 8 panels. Each panel shows the same frosted glass perfume bottle against a different background. Panel 1: Klein blue (#002FA7), Panel 2: Coral orange (#FF6F61), Panel 3: Sage green (#88C599), Panel 4: Amber yellow (#FFBF00), Panel 5: Dusty rose (#D4837B), Panel 6: Lavender purple (#9B59B6), Panel 7: Charcoal black (#2F3638), Panel 8: Ivory cream (#FFFFF0).
In each panel: 50ml frosted glass perfume bottle, centered, upright, shot at eye level with slight downward angle showing cap and body. Consistent luxury commercial style, soft studio lighting from upper-left 45 degrees, accurate glass reflectivity and liquid transparency visible, clean minimalist composition in every panel. No text, no watermarks, no decorative elements. Output: JPEG, grid layout for social media asset library. quality: medium ```
Why this matters for ecommerce teams: One prompt execution produces 8 ready-to-use social assets. Change the background color palette for seasonal campaigns. Swap the product description for SKU variations. The grid structure keeps everything visually consistent while maximizing output variety per generation cycle.
When to Use Low vs Medium vs High Quality
GPT-Image-2 supports three quality settings, and choosing the right one saves money without sacrificing acceptable output. Here is a practical decision tree for product photography workflows.
| Scenario | Recommended Quality | Why |
|---|---|---|
| White-background hero images (PDP, marketplace listings) | high | Detail accuracy, text sharpness, and material texture matter most here. These are your highest-conversion images. |
| Social media feed posts, Instagram/TikTok content | low or medium | Social platforms compress images aggressively. High quality is often wasted resolution. Low is fast and usually sufficient for preview content. |
| A/B test creatives, early concept exploration | low | You will generate 10-20 variants and discard most of them. Speed and cost matter more than perfection at this stage. |
| Lookbook or campaign visuals with complex composition | medium or high | Multiple subjects, backgrounds, and styling cues need fidelity. Medium is often the sweet spot. |
| Images that will be upscaled or edited further | medium | If you plan to run the output through an upscaler or image replacer, medium gives you good enough input without paying for unused high-resolution pixels. |
Cost implication: At typical API pricing, dropping from `high` to `low` can reduce per-image cost by 60-80% depending on provider. For a batch of 100 social preview images, that difference is significant. Start low, promote only final candidates to higher quality.
Common Prompt Mistakes in Product Photography
These five patterns account for most failed generations. Each one maps directly to a framework module.
Mistake 1: Vague subject description.
- *Bad*: "a nice pair of shoes"
- *Fix*: "tan leather Oxford shoes, lace-up closure, cap-toe embossing label, 45-degree angle"
- Module: 2
Mistake 2: Missing lighting specification entirely.
- *Bad*: (no lighting mentioned, letting the model guess)
- *Fix*: "Softbox 3-point lighting, pure white background, even illumination"
- Module: 4
Mistake 3: Using hype words instead of concrete style references.
- *Bad*: "ultra-premium stunning luxury-quality image"
- *Fix*: "commercial photography style with visible leather grain, accurate stitching, subtle surface wear"
- Module: 3
Mistake 4: Not specifying what to exclude.
- *Bad*: (only describes what you want, nothing about limits)
- *Fix*: "No watermarks, no extra objects, no deformed geometry, preserve exact lacing pattern"
- Module: 6
Mistake 5: Overloading one prompt with too many conflicting instructions.
- *Bad*: A 200-word prompt covering every possible requirement
- *Fix*: Start clean with 6 modules, then iterate single changes ("make lighting warmer," "change angle to 30 degrees")
- General principle: OpenAI's prompting guide calls this "iterate instead of overloading." Start simple, refine incrementally.
From One Photo to Many: Scaling Your Prompt Workflow
Single images are useful, but ecommerce teams rarely need just one. They need variations, seasonal refreshes, and multi-platform adaptations. Here is a repeatable workflow using the 6-module framework.
Step 1: Build your base prompt. Fill in all 6 modules for your primary use case (white background, lifestyle, or ad creative). This becomes your master template.
Step 2: Generate first batch (3-5 variations). Use `quality: medium` for initial exploration. Review outputs against your checklist. Pick the best 1-2.
Step 3: Refine with targeted edits. For each selected output, send a single-module adjustment: "Keep Modules 1, 2, 3, 4, 5, 6 the same. Change only Module 3: replace 'heritage footwear' with 'editorial streetwear'." This isolates variables.
Step 4: Scale to new contexts. Take your validated prompt and swap only Module 1 (canvas/platform) and Module 4 (lighting/background) to adapt the same product for different platforms. Keep Modules 2, 3, 5, 6 intact or minimally adjusted.
Step 5: Document your winning prompts. Save the exact prompt text that produced your best outputs. Build an internal prompt library by product category. This reduces future trial-and-error.
How iCreat AI Fits Into This Framework
Structured prompts give you control over every decision: angle, lighting, style, text, constraints. That control matters when you need a specific output that templates can't deliver, or when you're learning how AI image generation actually works under the hood.
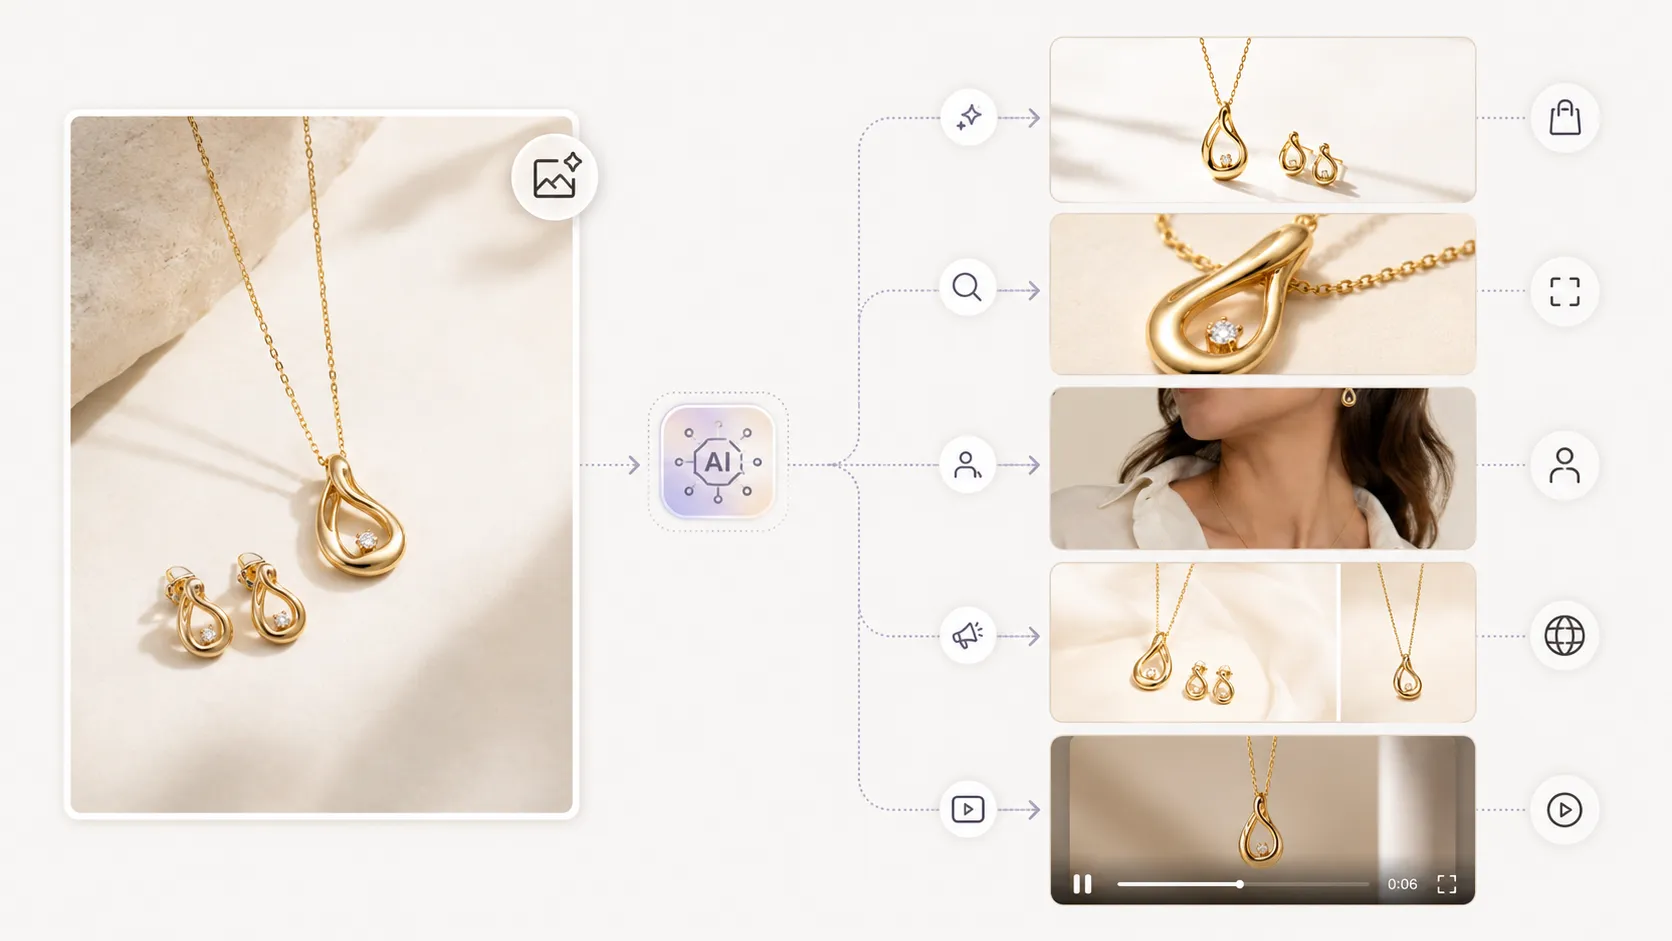
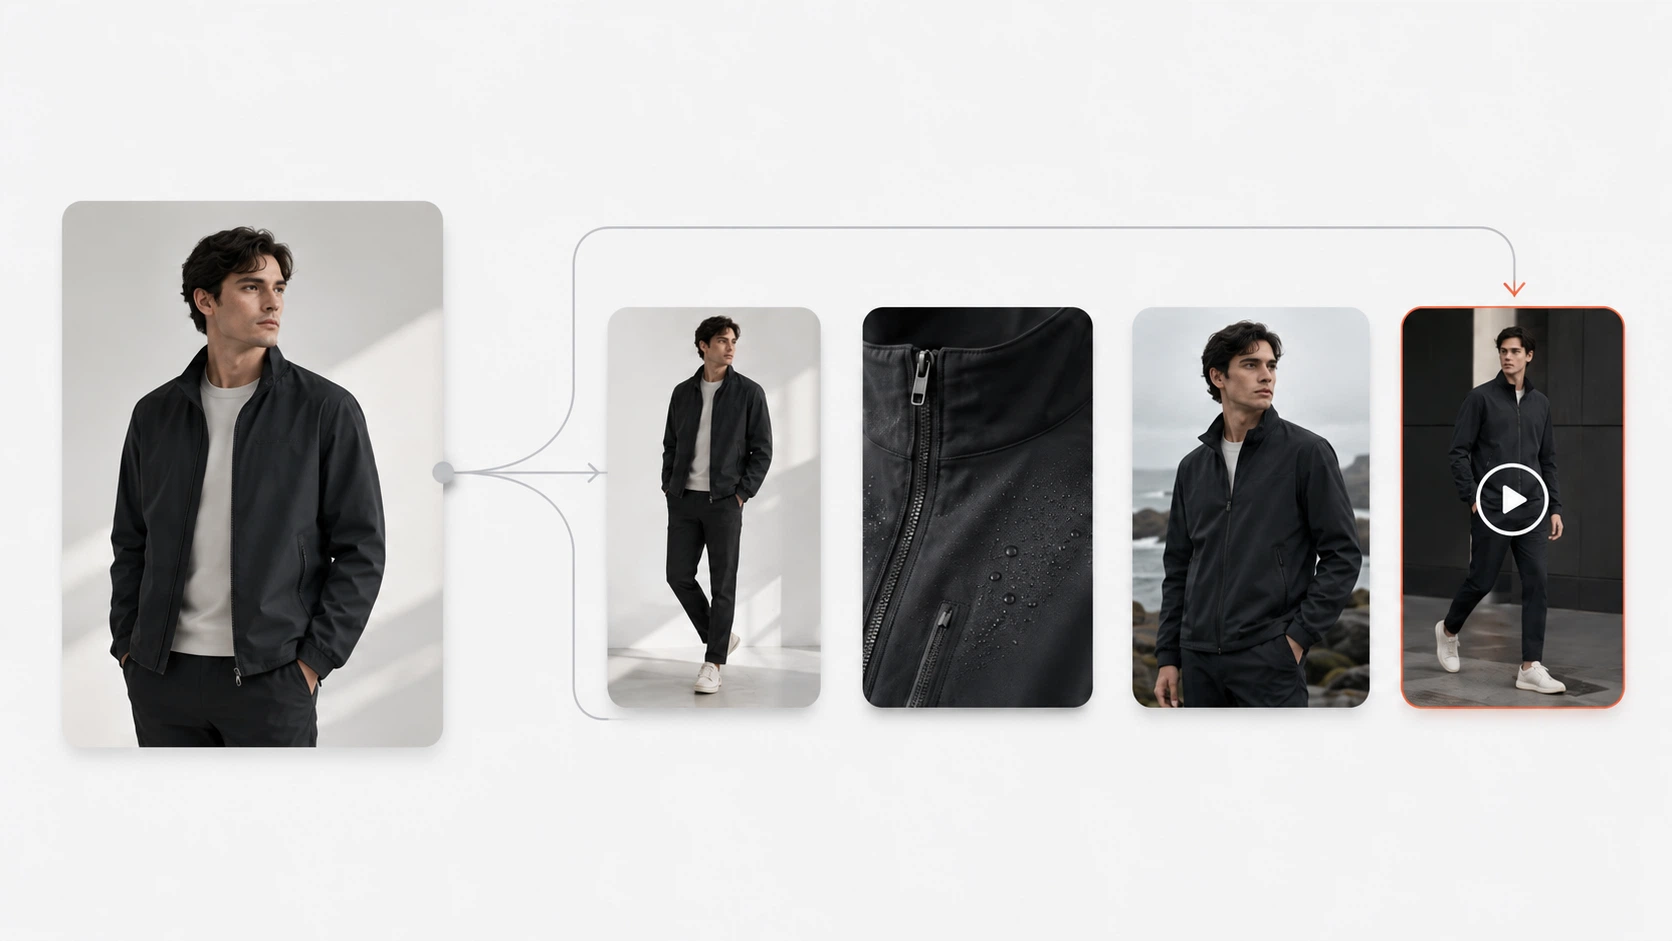
iCreat AI's AI Product Photography tool takes a different approach. It gives you 5,000+ pre-built templates that already encode these 6 modules internally. Each template is a pre-engineered prompt for a specific use case: white-background hero images, lifestyle shots, detail close-ups, lookbook layouts, and more. You pick a template, upload your product reference, and the system handles prompt construction.
The two approaches serve different moments. Use the 6-module framework when you want full manual control or are experimenting with GPT-Image-2 directly. Use iCreat AI's template library when you need to move fast and don't want to think about module structure.
If you want to try the framework manually with GPT-Image-2 before committing to any tool, start with a single product image and work through all 6 modules. If you hit a wall or simply need faster results, log in to iCreat AI and try the template-based approach.
FAQ
Conclusion
Structured prompts won't make writing harder. They'll make debugging faster when something goes wrong. When your product image comes out wrong, a structured framework tells you exactly which lever to pull instead of forcing you to start over.
Start with Module 1 (canvas) and Module 2 (subject) — these two alone fix 60% of common product photography failures. Add Module 3 (style/aesthetics) and Module 4 (lighting) when you need category-specific quality. Use Module 5 (text) sparingly and Module 6 (constraints) always.
Try the framework on your next product image. If you want pre-built templates that already encode this structure, explore iCreat AI's AI Product Photography workspace — 5,000+ templates covering major ecommerce categories are waiting, and you can upload your own reference image to customize any template in seconds.