



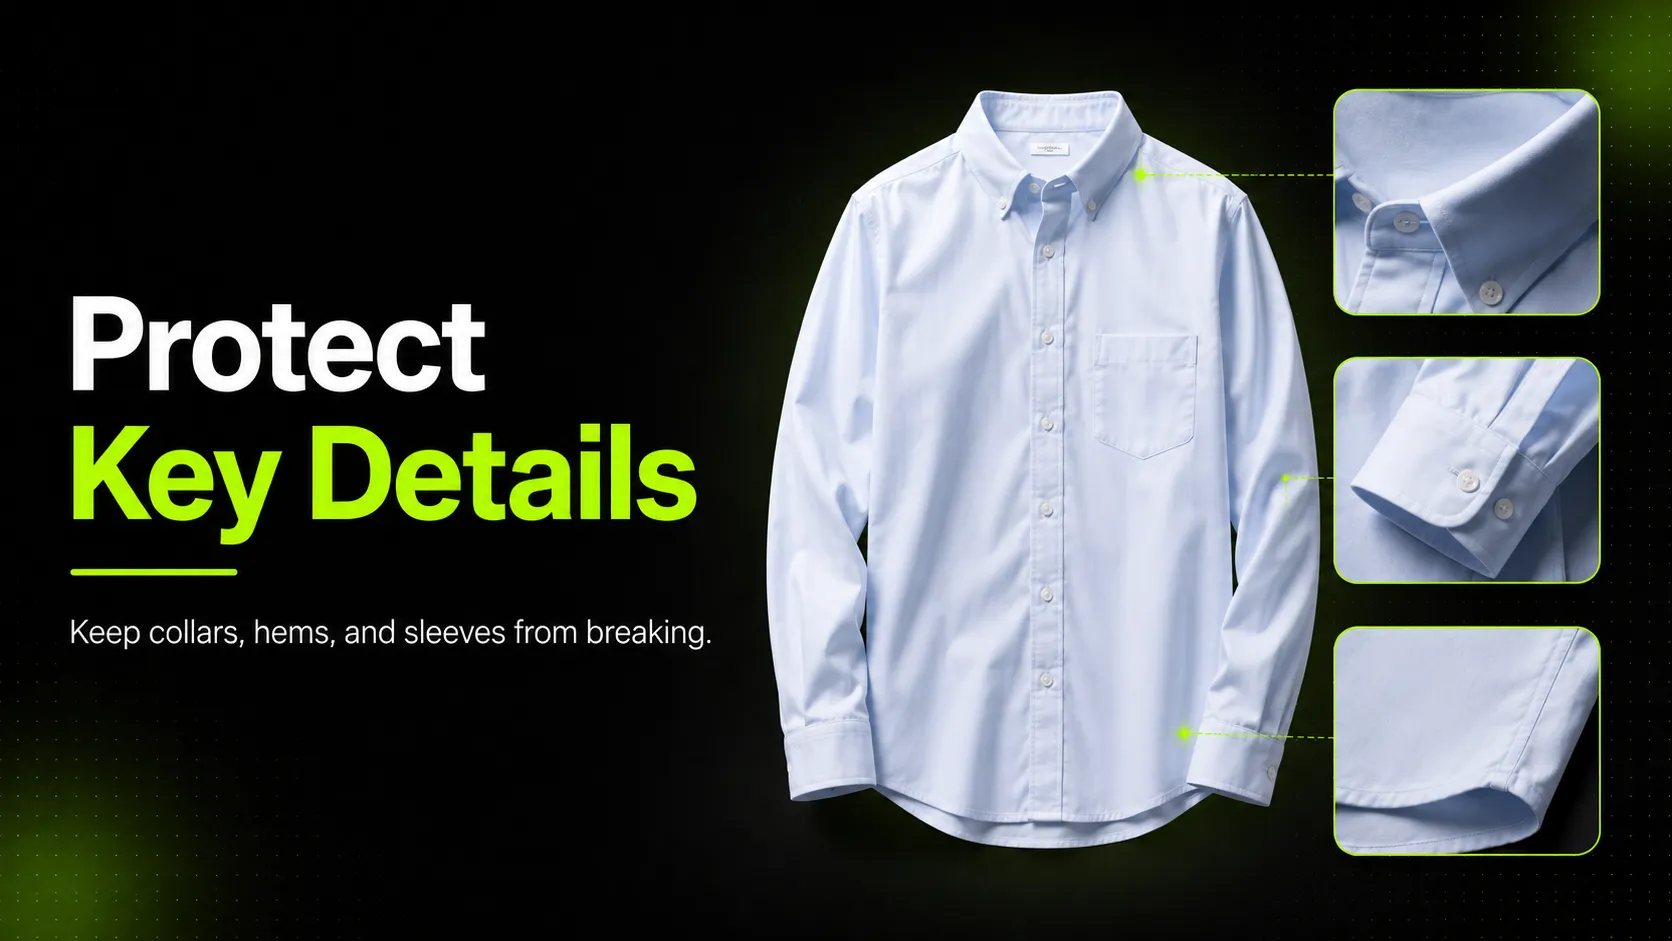
You upload a clean product photo of a button-down shirt into an AI tool and generate an on-model image. The result looks good at first glance -- right color, right pose, decent lighting. Then you zoom in. The collar has an extra button placket that was never there. The left sleeve is two inches shorter than the right one. The hem that should curve gently across the hips is dead straight. The third button from the top is missing.
These are not random glitches. They are predictable failure modes that cluster around three specific areas of any garment: the collar, the sleeves, and the hem. Generic AI image models handle these details differently than they handle overall shape or color because collars, sleeves, and hems require geometric precision that statistical image generation does not naturally preserve.
This guide explains why each of these three detail types fails, how to diagnose which error you are seeing, and how to prevent breakage before it happens using better inputs, targeted references, and specific prompt language.
Key Takeaways
- Collar, hem, and sleeve errors happen because generic AI models repaint garments from statistical likelihood rather than preserving exact input geometry.
- Collars fail when the model treats necklines as simple 2D shapes rather than complex anatomical curves with construction specifics.
- Sleeve errors cluster around length asymmetry, armhole disconnection, and cuff detail loss.
- Hem errors involve shape flattening, continuity failure, and finish-type confusion.
- Detail-reference images (close-ups of the failure-prone area) are the single most effective prevention input for all three error types.
- Always verify collar, sleeve, and hem accuracy before publishing AI-generated product visuals, even when the overall image looks correct.
Why These Three Details Fail More Than Others
Generic AI image models do not copy your product. They look at your reference image, identify it as a type of object (a shirt, a dress, a jacket), and then paint a new image based on everything they have learned about how that type of object usually looks. This works well for overall impression -- color, silhouette, general style. It fails for construction details because the model has no internal rule that says "the collar must match the reference exactly."
When the reference shows a plain crewneck tee but does not make the collar area explicitly clear, the model fills that gap with its most likely guess for "tee shirt neckline." When the reference is cropped at the wrist so the cuff is not visible, the model invents one. When the hem falls outside the frame, the model completes it using average proportions rather than your garment's actual shape.
Collars, sleeves, and hems are the edge geometries of a garment. They are where flat fabric meets body contour, where construction choices create visible structure, and where small deviations from the original product become obvious to anyone who knows what they bought. A slightly wrong shade of blue might go unnoticed. A missing button, a lopsided collar stand, or a sleeve that ends above the elbow when it should reach the wrist will generate returns.
Collar Breakdown: What Goes Wrong and Why
Collar errors are usually visible immediately because the collar sits at eye level in most on-model shots and frames the face. Common collar failures include:
Invented collars and necklines: A crew neck gains a collar that was never there. A V-neck rounds itself off into a scoop. A collarless tank sprouts a polo-style placket. The model defaults to whatever neckline it has seen most often for that garment category rather than preserving your specific design.
Hidden or extra construction: A button-down gains buttons where there were none, or loses half its placket. A hood vanishes or flattens into a collar-like shape. An open collar appears closed. These happen because the model recognizes "shirt-like object" but does not lock the specific closure type.
Shape distortion: A point collar becomes rounded. A spread collar narrows. A band collar twists or waves unnaturally. The model treats the collar as a simple 2D boundary rather than a constructed 3D form with interfacing, stiffness, and intentional drape characteristics.
For a button-down Oxford shirt, collar accuracy matters because the collar defines the garment's formality level, fit impression, and brand positioning. A dress shirt that arrives with a different collar than the one shown in the product photo creates a "not as described" return reason even if everything else matches.
Sleeve Breakdown: Length, Attachment, and Cuff Errors
Sleeve failures are common because sleeves involve multiple connection points (shoulder seam, armhole, cuff) and a long surface area where details can drift. Typical sleeve errors:
Length asymmetry: One sleeve renders shorter than the other. This happens because the model generates each side independently without a strict symmetry constraint. On some tools, the difference can be substantial enough to look like a manufacturing defect rather than a styling choice.
Armhole disconnection: The sleeve appears to float near the shoulder rather than connecting through a natural armhole seam. Or the sleeve merges into the torso fabric without a visible seam line. The model struggles with how fabric wraps from the shoulder around the upper arm because it does not understand body-topology geometry.
Cuff or end-detail loss: A ribbed cuff smooths out into plain jersey. An elasticized wrist disappears. A rolled-up sleeve tab vanishes. Buttoned cuffs lose buttons or change count. These are detail-density problems: the reference image may show the cuff at low resolution, or the cuff may be partially cropped, so the model substitutes a generic sleeve ending.
Sleeve-body proportion drift: The sleeve cap (the curved top part that fits into the armhole) gets too tall or too shallow, making the whole sleeve sit differently on the arm than the original. A relaxed shoulder becomes a dropped shoulder. A set-in sleeve converts to a raglan seam line. These are fit-alteration errors that change the garment's silhouette.
For a ringer tee with contrast ribbed cuffs, sleeve accuracy affects whether the buyer perceives the item as a premium basic or a cheap substitute. The ribbed cuff is a visible quality signal that AI models routinely erase or flatten.
Hem Breakdown: Shape, Continuity, and Finish Errors
Hem errors tend to be subtler than collar or sleeve issues because hems appear lower in the frame and are often partially obscured by pose or hand position. But they matter for fit perception:
Curved-to-straight conversion: A dress with a curved hemline (longer on the sides) generates with a straight-across hem. A high-low hem flattens to uniform length. A handkerchief hem becomes a standard cut. The model prefers straight lines because they are statistically more common in training data and easier to render consistently.
Asymmetry loss: Any hem that is intentionally longer in back than front (common in blazers, coats, and some dresses) generates as symmetric. The model assumes symmetry unless the reference makes the asymmetry extremely obvious.
Finish-type confusion: A raw-edge hem becomes folded. A narrow rolled hem widens. An elasticized waistband converts to a flat sewn hem. Visible stitching (coverstitch, blind hem stitch) disappears. The model sees "bottom edge of garment" and applies its default bottom-edge treatment.
Continuity failure: On garments with prints or stripes that run across the hem, the pattern shifts, bends, or breaks at the hemline instead of continuing cleanly to the edge. The model completes the pattern independently in the lower region without referencing how it connects to the body of the garment.
For a floral-print summer dress, hem accuracy determines whether the print looks professionally aligned or like a sloppy repeat. A curved hem that goes straight also changes how the dress hangs on the body, which affects fit expectations.
Diagnosis: Identify Your Error Type
Not all detail breakage is the same, and different errors call for different fixes. Use this framework to identify which failure mode you are seeing:
| Your output shows | Error type | Primary fix |
|---|---|---|
| Extra collar, wrong neckline shape, vanished hood | Collar invention | Detail reference of collar/neckline + prompt naming exact style |
| Uneven sleeve lengths, floating armhole | Sleeve geometry | Full-garment reference showing both sleeves + symmetry prompt |
| Cuff smoothed out, wrong length | Sleeve end detail | Close-up cuff reference + specify cuff type in prompt |
| Curved hem went straight, asymmetric hem flattened | Hem shape | Reference showing full hemline + describe hem shape in prompt |
| Print shifted or blurred at edges | Pattern continuity | High-res main reference + detail shot of print area |
| Buttons wrong count or type, zipper gone | Closure drift | Specify exact closure type and count in prompt |
| Multiple areas wrong simultaneously | Compound failure | Improve main reference + add detail references + stronger prompts |
If you see errors in more than two categories, start with your input quality (Section below) before adjusting prompts or adding references. A weak main reference forces the model to guess across all zones simultaneously.
Prevention Method 1: Upload Detail References for Failure-Prone Areas
The single most effective way to reduce collar, hem, and sleeve breakage is to give the AI explicit visual data about those specific areas through a dedicated detail-reference image.
Most AI product photography tools accept multiple reference images or have a designated slot for close-up detail shots. The AI Fashion Detail Image Generator uses a detail-image input specifically designed to capture close-up information about fabric texture, print alignment, and construction details that the main product photo may not show clearly enough.
Here is how to use detail references for each failure-prone area:
For collar accuracy: Upload a close-up shot centered on the collar or neckline. Show the full collar spread, any placket or button detail, the neckline-to-shoulder transition, and the interior collar facing if relevant. The detail reference tells the model exactly what the collar construction looks like rather than forcing it to infer from a distance shot.
For sleeve and cuff accuracy: Upload a close-up of one sleeve cuff or hem end. If the garment has distinctive cuffs (ribbed, buttoned, elasticized, rolled), the close-up preserves the exact width, texture, and finish type. For sleeve-length-critical items (blazers, dresses, outerwear), include enough of the upper sleeve in the detail shot to show the sleeve-cap shape.
For hem accuracy: Upload a close-up of the hem area showing the finish type, the shape (curved vs. straight vs. asymmetric), and any hemline-specific details like topstitching, coverstitch tape, or a contrast facing. If the garment has a print, ensure the detail shot captures where the pattern meets the hem edge.
For print and texture accuracy: Upload a flat-lay or ghost-mannequin shot of the most detailed area of the garment. Prints, logos, embroidered elements, and textured weaves need pixel-level clarity that a full-body on-model reference rarely provides at sufficient resolution.
The AI Fashion Lookbook Generator extends this approach through a three-image upload workflow: a main image for overall composition, a detail image for close-up texture and construction, and a back-view image for rear details. Using the detail slot for a collar/cuff/hem close-up while the main image establishes the overall garment gives the model two separate sources of information about the same product, which significantly reduces the invention rate in both zones.
Prevention Method 2: Optimize Your Main Reference Image
Detail references work best when the main reference image is already strong. A weak main image plus a detail reference still leaves gaps. Optimize your primary input with these collar-hem-sleeve-specific checks:
Show the full garment with margin: Every edge that touches the frame is an edge the model must complete on its own. If the cuff, collar tip, or hemline is cropped even slightly, the model will improvise that section. Leave generous padding around all sides of the garment.
Shoot perpendicular to the garment: Angled references (shot from above, below, or from the side) distort the apparent proportions of sleeves, collar spread, and hem length. Position the camera at the center height of the garment, pointed directly at it, with the sensor plane parallel to the garment plane.
Light detail areas evenly: Harsh shadows on the collar hide placket structure. Glare on the sleeve obscures ribbed texture. Deep shadows in a curved hem make the shape ambiguous. Use diffused lighting from both sides so collar, cuffs, and hem are all evenly illuminated with no blown-out highlights or crushed blacks.
Meet the resolution threshold: Aim for at least 1000 pixels on the shortest edge. Below this, the model cannot resolve individual stitches, weave loops, button holes, or fine print detail, and it will substitute approximations that look plausible at thumbnail size but wrong when inspected.
Capture the actual garment, not a styled version: If you photograph the garment on a hanger with the sleeves pushed up, the AI will generate sleeves pushed up. If you fold the collar down, the AI generates a folded collar. Present the garment in the state you want the output to show: collar spread, sleeves at full length, hem hanging naturally.
Prevention Method 3: Prompt for Preservation, Not Creation
Once your references are uploaded, use prompt language that tells the model to preserve specific attributes rather than generating new ones. General prompts like "woman wearing a shirt" give the model permission to invent collar, sleeve, and hem details. Specific prompts constrain that permission.
Name the collar type precisely: Instead of "shirt," use "button-down oxford shirt with point collar, no stand, open collar, seven-button front placket." Instead of "hoodie," use "pullover hoodie with drawstring hood, kangaroo pocket, ribbed cuffs and waistband." The more specific the collar description, the less room the model has to substitute its default.
Specify sleeve length and cuff type: "Long sleeve with 1.5-inch ribbed knit cuff, set-in sleeve, relaxed shoulder." "Short sleeve, 6-inch inseam, raw edge hem, no cuff." "Three-quarter sleeve with narrow band cuff, slight puff at shoulder." Include the measurement if it matters for your product presentation.
State hem characteristics explicitly: "Curved hem, slightly longer in back than front." "Straight hem with 1-inch folded bottom hem." "Raw edge, no finish." "High-low hemline, shortest at left hip, longest at right side." If the hem shape is a selling feature of the garment, describe it in every generation until the model consistently produces it correctly.
Describe closures with counts: "Seven-button front placket, no zipper." "Center-front zipper from neckline to hem, no buttons." "Snap-button cuffs, two snaps each." "Hook-and-eye closure at back neckline." Counts and closure types are discrete facts that the model either knows or guesses; specifying them removes the guesswork.
Use negative prompts when available: If your tool supports negative prompting, exclude the most common inventions: `extra collar, wrong sleeve length, uneven sleeves, missing buttons, altered hemline, extra fabric, crooked collar.` Negative prompts do not guarantee avoidance, but they reduce the probability of the most frequent errors.
When to Regenerate, Fix, or Accept
After generation, categorize the output before deciding what to do with it:
Regenerate when: The error changes the product identity (wrong collar type = different shirt). The error is in a high-visibility area (collar or upper chest). Multiple error types appear simultaneously (collar invented AND sleeves mismatched AND hem flattened). The fix is straightforward (improve reference or adjust prompt) and regeneration cost is low.
Accept with note when: The deviation is minor and would not cause a return (slight sleeve-length difference under half an inch, tiny collar-spread variation). The error is in a low-visibility area (lower hem partially obscured by pose or hand). The publication context is tolerant (social media concept shot, mood-board imagery, internal review draft).
Post-edit when: The output is strong except for one localized flaw (one button missing, small collar-wave on one side, slight print shift). You have editing capacity and the base output is worth saving. Inpainting or manual correction is faster than regenerating from scratch and hoping all other details survive the second attempt.
Tolerance guidance by publication context:
| Context | Collar tolerance | Sleeve tolerance | Hem tolerance |
|---|---|---|---|
| Product page hero image | Must match exactly | Within 3mm length | Shape must match |
| Product page secondary | Minor wave acceptable | Minor asymmetry OK | Slight curve diff OK |
| Social ad creative | Style match sufficient | Proportional roughly | Not critical |
| Lookbook / editorial | Interpretation allowed | Pose-dependent | Artistic license |
Quality Checklist: Collar, Hem, and Sleeve Verification
Before publishing any AI-generated garment image, run through these checks. They take less than 30 seconds and catch the errors that generate returns.
Collar verification
- [ ] Collar type matches the actual product (point / spread / band / camp / hood / none)
- [ ] Neckline shape is correct (crew / V-neck / scoop / boat / square / strapless)
- [ ] Placket or front closure matches (button count, zipper presence, hidden placket absence)
- [ ] Collar stand height (if applicable) looks proportional to the original
- [ ] Interior collar or facing is not popping out or visible where it should not be
Sleeve verification
- [ ] Both sleeves appear to be the same length (within acceptable tolerance for context)
- [ ] Sleeves connect naturally to the shoulder / armhole (no floating or merged appearance)
- [ ] Cuff or end finish matches the actual product (ribbed / elastic / buttoned / rolled / raw)
- [ ] Sleeve cap shape fits the garment type (set-in / raglan / dropped / puff)
- [ ] Sleeve fabric texture matches the body (no smooth-over-ribbed conversion)
Hem verification
- [ ] Hem shape matches the actual product (straight / curved / asymmetric / high-low / handkerchief)
- [ ] Hem finish type is correct (folded / raw / elastic / bound / coverstitched)
- [ ] Asymmetric hems retain their intended longer/shorter zones
- [ ] Print or pattern continues cleanly to the hem edge without shift or blur
- [ ] Hemline sits at the correct vertical position on the body
Cross-cutting verification
- [ ] Button / snap / zipper count is correct
- [ ] Print, logo, or graphic is in the right position and orientation
- [ ] Fabric texture (ribbed / cable / smooth / pile) matches across all garment zones
- [ ] Overall silhouette and fit match the original product's cut
If any critical check fails, regenerate with an improved reference or adjusted prompt before publishing.
FAQ
Conclusion
Collar, hem, and sleeve details break in AI images because these areas sit at the intersection of geometric precision, construction specificity, and visual prominence. Generic AI models generate based on statistical likelihood, and the statistically likely collar, sleeve, or hem is not the same as the specific one on your product. The model invents what it expects to see rather than copying what you actually provided.
The prevention stack that works best combines three layers: optimized main references that show every edge of the garment clearly, detail-reference images that give the AI explicit pixel data for the failure-prone zones, and prompt language that names the specific attributes to preserve rather than leaving them open to interpretation.
For fashion ecommerce teams that need to preserve collar construction, cuff details, hem shape, and print alignment in AI-generated visuals, the AI Fashion Detail Image Generator accepts dedicated detail-image uploads alongside main product references, giving the model close-up information about exactly the areas where breakage typically occurs. For teams generating full product images where detail accuracy matters across the entire garment, AI Product Photography supports up to 10 reference images and uses detail-preserving models designed to keep real product attributes intact rather than reinventing them.
The output will not be perfect every time. But with the right references, the right input quality, and the right prompt specificity, the rate of collar, hem, and sleeve errors drops dramatically. Most generations pass on the first try. The ones that fail fail in smaller, fixable ways. And the ones that pass are accurate enough that a shopper who receives the actual product will recognize it from the image.