



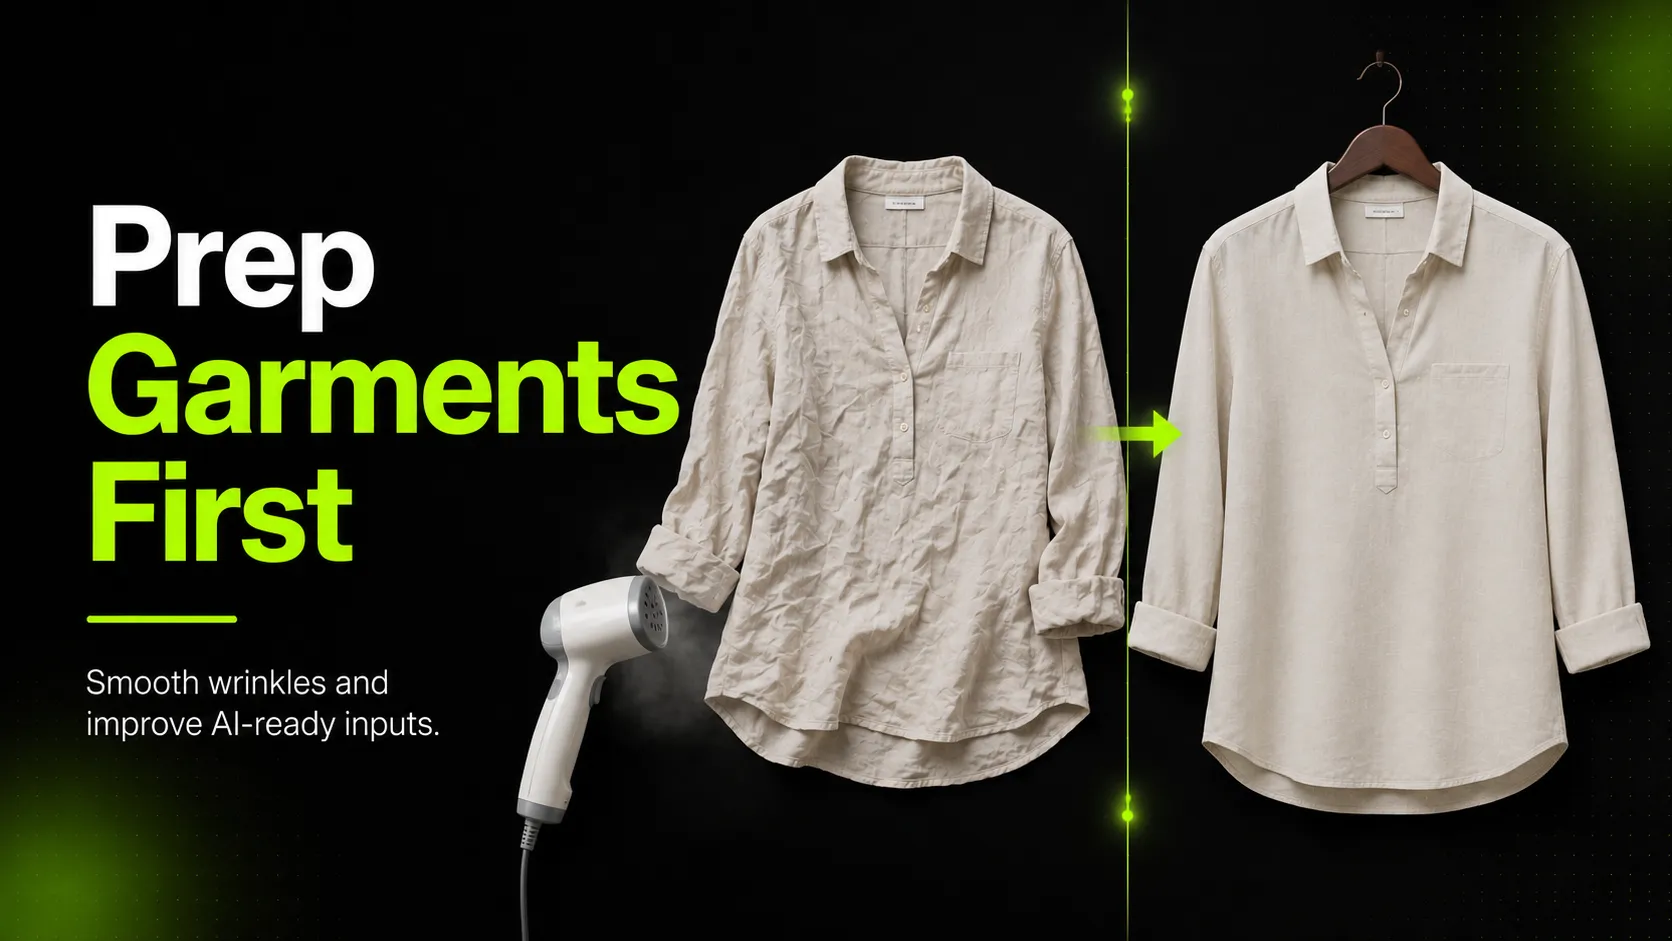
You uploaded a garment photo to an AI product photography tool and the output came back with strange creases, distorted seams, or a shape that does not quite match what you photographed. The problem usually starts before the image reaches the AI model. Wrinkles, uneven fabric, deep fold lines, and poor lighting in your reference image give the model confusing signals about what the garment actually looks like.
The fix is not a better prompt or a different tool. It is better preparation of the input image itself.
This guide walks through how to prepare wrinkled or uneven garment photos before AI generation, so the output matches what you intend to create.
Key Takeaways
- Wrinkled or uneven garment photos confuse AI models because the model interprets creases and folds as structural features, not surface noise.
- Steaming, proper layout selection, and diffuse lighting are the three highest-impact preparation steps.
- Deep storage fold lines on heavy garments need hanging time, not just heat.
- Reference image resolution and format matter, but physical preparation matters more.
- Common mistakes include expecting AI to "fix" wrinkles, ignoring collar/hem/cuff visibility, and over-editing before upload.
- iCreat AI's AI Product Photography supports up to 10 reference images and is designed for ecommerce garment visualization workflows.
Why Garment Photo Quality Matters for AI Generation
AI product photography tools interpret reference images by detecting edges, surfaces, shapes, and texture patterns. When a garment has visible wrinkles or uneven fabric, the model receives mixed signals: it sees both the intended shape of the clothing and the accidental distortion from creases and folds. The result is often an output that smooths some details, exaggerates others, or produces unnatural fabric behavior that does not match the original product.
For fashion ecommerce teams, this matters because shoppers make decisions based on accurate visual information. If the input misrepresents the garment, the AI output will too — and no amount of post-generation editing fully recovers detail that was never captured correctly in the first place.
The practical question is not whether AI can "fix" a bad reference. It is whether you can give the model enough clean information to generate something useful for a product page, campaign visual, or marketplace listing.
Assess Your Garment Photo: What Needs Fixing
Before making any changes, look at your reference image and identify which problems will affect AI output most:
Wrinkles and creases across the main body: These are the most common issue. Cotton t-shirts, linen dresses, and lightweight knits show wrinkles easily. The AI may interpret a wrinkle as a design feature (a seam, a stripe, a panel line) rather than surface noise.
Deep fold lines from storage or shipping: When a garment has been folded for days, the crease lines can be sharp enough that the model treats them as structural edges. This is especially problematic for dark fabrics where folds catch shadows.
Uneven fabric lay: One side of the garment bunches while another stretches flat. The AI receives inconsistent spatial information and may generate a warped version of the product.
Shadows hiding detail: Overhead lighting or off-angle light creates shadows inside wrinkles and folds. The model cannot distinguish between shadow and actual dark fabric, so it fills in the gaps with guesses.
Low resolution or compression artifacts: A small or blurry reference gives the model fewer pixels to work with. Fine details like stitching, logo placement, or fabric texture get lost.
Not every issue requires the same fix. A wrinkled cotton t-shirt needs steaming; a shadowed jacket needs repositioning; a low-resolution photo needs reshooting. Diagnosing the specific problem first saves time on unnecessary steps.
Step 1: Steam or Iron Out Wrinkles and Creases
Steaming is the fastest way to remove wrinkles without pressing creases into the fabric. For most ecommerce garments, a handheld steamer or upright steamer with 5–10 minutes of heat time is enough to relax surface wrinkles on cotton, polyester blends, rayon, and standard knitwear.
Ironing works when you need a completely flat surface — useful for items you plan to photograph as flat lays. Use the appropriate heat setting for the fabric type and avoid over-drying synthetic materials, which can create shine that confuses AI texture interpretation.
For delicate fabrics like silk, chiffon, or anything with embellishments, use lower heat and steam only. The goal is to relax the fabric enough that wrinkles disappear, not to press it into a board-flat state if that damages the material.
What steaming cannot do is remove deep storage fold lines from heavy garments like denim jackets or wool coats. Those require a different approach, covered in the next section.
Step 2: Choose the Right Layout — Flat Lay vs Hanging vs Mannequin
The way you position the garment before photographing affects what the AI can and cannot see:
Flat lay: Best for t-shirts, tops, dresses, shorts, and any item where you want the full front or back surface visible. Flat laying works well when the garment is naturally two-dimensional and does not have complex 3D structure. Make sure the fabric is spread evenly without bunching at the seams.
Hanging or on a mannequin: Better for structured items like blazers, jackets, coats, and anything with shoulders or sleeves that need natural drape. Hanging lets gravity pull the fabric into its intended shape, which often removes many wrinkles automatically. The tradeoff is that hanging introduces vertical folds under the arms or along the sides that you will need to manage.
On a hanger or dress form: Useful for dresses, jumpsuitses, and flowy garments that should show how fabric moves. This layout preserves the garment's natural silhouette but requires careful smoothing of any remaining wrinkles after the item is hung.
Choose the layout based on how the final AI-generated image will be used. If you need a clean product page shot, flat lay is usually the stronger starting point. If you need a lifestyle or campaign visual, a mannequin or hanging shot may give the AI more realistic draping information.
Step 3: Fix Uneven Fabric and Fold Lines
Uneven fabric usually comes from one of three sources: storage folds, packaging creases, or the garment's own construction.
For storage folds on heavy items like denim jeans or outerwear, hang the garment for 24–48 hours before shooting. Gravity and ambient humidity will relax most fold lines. If time is short, use a steamer on the medium setting and run it slowly along each fold line, then smooth the fabric by hand while it is still warm.
For packaging creases on newly received inventory, the same approach applies: hang, wait, then steam remaining lines. Avoid using high heat on any area with adhesive labels, prints, or heat-sensitive trims.
For construction-related unevenness — where the garment simply does not lie flat because of seams, panels, or lining — adjust the photo angle rather than forcing the fabric into an unnatural position. Slight angles (15–30 degrees from straight overhead) can hide minor unevenness while still giving the AI a clear view of the product shape.
If a garment refuses to lie flat because of its cut or fabric weight, do not force it. Photograph it in its natural state and accept that the AI output will follow the garment's real drape rather than an idealized version that does not exist.
Step 4: Optimize Lighting to Reduce Shadows and Hotspots
Lighting is the factor that makes the biggest difference between a usable reference image and one that confuses the AI model. The goal is even, diffuse light that shows fabric texture without creating deep shadows inside wrinkles or harsh highlights on glossy surfaces.
Natural light near a window is the simplest option. Position the garment within a few feet of a large window, ideally on an overcast day or with a thin white curtain diffusing direct sunlight. North-facing windows tend to provide softer, more consistent light throughout the day. As Shopify's product photography documentation notes, natural light captures color and texture more accurately than artificial sources, which helps the AI interpret fabric correctly.
Avoid overhead lighting when possible. Lights directly above the garment cast shadows downward into every wrinkle and seam, giving those areas darker pixel values that the model reads as features rather than noise. Side lighting at a 30–45 degree angle from the camera creates gentle dimension without filling every crease with shadow.
Reflectors help when you cannot avoid difficult lighting. A piece of white foam board or cardstock placed opposite the light source bounces fill light into shadowed areas. This does not eliminate wrinkles visually, but it reduces the contrast between lit and shadowed fabric, which gives the AI cleaner edge data to work with.
If you are working indoors with limited options, shoot during the part of the day when light is softest — early morning or late afternoon — and avoid midday sun, which creates hard shadows and blown-out highlights that obscure fabric detail.
Step 5: Capture or Select the Best Reference Angle
The angle at which you photograph the garment determines what the AI model can see and what it must guess.
Straight overhead (90 degrees) gives the most complete view of the garment's outline and surface pattern. This is the standard angle for flat-lay ecommerce shots and for most AI product photography inputs. It works best when the fabric is already smooth and evenly laid out.
Slight angle (15–30 degrees) adds subtle depth and can make structured garments like jackets look more natural. It also hides minor unevenness in the fabric lay. The cost is that the AI now has perspective to interpret, which can slightly distort proportions if the angle is too steep.
Eye-level or three-quarter angle is appropriate when you want the AI to generate a lifestyle-style output rather than a clean product shot. These angles show how the garment drapes on a body but introduce more variables (pose, background interaction, partial occlusion) that may distract from core product accuracy.
For most AI generation workflows, start with a straight-overhead or near-overhead shot. It gives the model the clearest signal about shape, size, and surface detail. You can always add angled references later if the tool supports multiple uploads.
Step 6: Check Resolution, Format, and File Quality
Before uploading to an AI tool, verify that your reference image meets basic technical requirements:
Resolution: Most AI product photography tools work best with images above 1000px on the shortest side. iCreat AI supports up to 4K output and accepts up to 10 reference images per generation session, so feeding it reasonably high-resolution input helps the model preserve fine details like stitching, small logos, and fabric weave.
Format: JPEG is acceptable for most garment photos. PNG is preferable if you have a transparent background or need lossless quality. Avoid highly compressed files that introduce artifacting around edges — these compression artifacts can look like texture or pattern to an AI model.
Color space: sRGB is the standard for web-based AI tools. If your camera or editing software outputs Adobe RGB or another wide gamut profile, convert to sRGB before uploading to avoid color shifts in the generated output.
Cropping: Leave a small margin around the garment rather than cropping tightly to the edges. Some AI tools perform better when they can see the full context of the product, including slight background that helps define the outline.
If your reference image is blurry, noisy, or heavily edited with filters, consider reshooting rather than uploading. The AI model cannot recover detail that was never captured in the first place.
Common Preparation Mistakes That Hurt AI Output
Some preparation errors show up repeatedly in AI-generated garment visuals. Knowing them in advance saves rework:
Uploading a photo with visible wrinkles and expecting the AI to "iron" the garment. Most AI product photography tools change backgrounds, lighting, composition, and scene context. They do not digitally steam clothes. If the input has wrinkles, the output will likely have wrinkles too — sometimes amplified, sometimes interpreted as design features.
Using a photo with deep storage fold lines as if the garment were new. Fold lines act like strong edges in the image. The AI may treat a center crease as a seam, a panel division, or a color block boundary. Hang the garment first, then reshoot.
Shooting a dark garment on a dark background with low contrast. When the garment and background have similar brightness values, the AI struggles to separate the product from its surroundings. Place dark garments on lighter surfaces (white, light gray, or neutral) so the model can clearly detect the product edges.
Over-smoothing in editing before uploading. Heavy noise reduction, sharpening, or skin-smoothing filters can erase fabric texture that the AI needs to generate realistic output. Upload the cleanest, least-edited version of the photo you have and let the AI handle the styling.
Ignoring the collar, cuffs, or hem in the reference. These areas contain important structural information. If they are folded, cropped, or in shadow, the AI will guess their appearance — and the guess is often wrong. Make sure key garment zones are visible, well-lit, and wrinkle-free in your reference.
Assuming higher resolution alone fixes everything. A 4K photo of a badly wrinkled garment is still a 4K photo of a badly wrinkled garment. Resolution matters, but physical preparation matters more. Start with a clean, well-lit 1200px image before worrying about 4K.
Pre-Upload Checklist
Before loading your reference image into an AI product photography tool, confirm:
- [ ] Wrinkles and surface creases have been removed by steaming, ironing, or hanging
- [ ] Deep storage fold lines have been relaxed (for heavy garments)
- [ ] Fabric lies evenly without bunching or tension
- [ ] Lighting is diffuse and does not cast harsh shadows into wrinkles
- [ ] The photo is taken from a suitable angle (overhead for flat lay, eye-level for lifestyle)
- [ ] Resolution is above 1000px on the shortest side
- [ ] File format is JPEG or PNG with minimal compression
- [ ] Key structural areas (collar, cuffs, hem, seams) are clearly visible
- [ ] Background provides reasonable contrast with the garment
- [ ] No heavy filters or over-editing has been applied
If more than three items on this list need attention, spend time on preparation now. It will save more time than generating multiple AI outputs and discarding them later.
From Prepared Photo to AI-Generated Visual
Once your garment reference image is clean, well-lit, and free of distracting wrinkles and folds, you are ready to upload it to an AI product photography tool. iCreat AI's AI Product Photography workflow accepts up to 10 reference images per generation session and supports models suited to different output needs: GPT-Image-1 for standard generation workflows and Nano Banana Pro for advanced commercial visuals where stronger detail restoration matters.
For teams preparing multiple garment references — say, a t-shirt, a dress, and a jacket for the same collection — the same preparation principles apply to each one. Consistent input quality across references tends to produce more coherent AI output sets, which matters when you plan to use the generated visuals together on a product page or in a campaign.
After generation, review the output for the same things you checked in the input: fabric texture accuracy, structural details like collars and hems, color fidelity, and overall product shape. Good input preparation does not guarantee perfect AI results, but it significantly improves the odds that the output will be useful on the first try.
---