



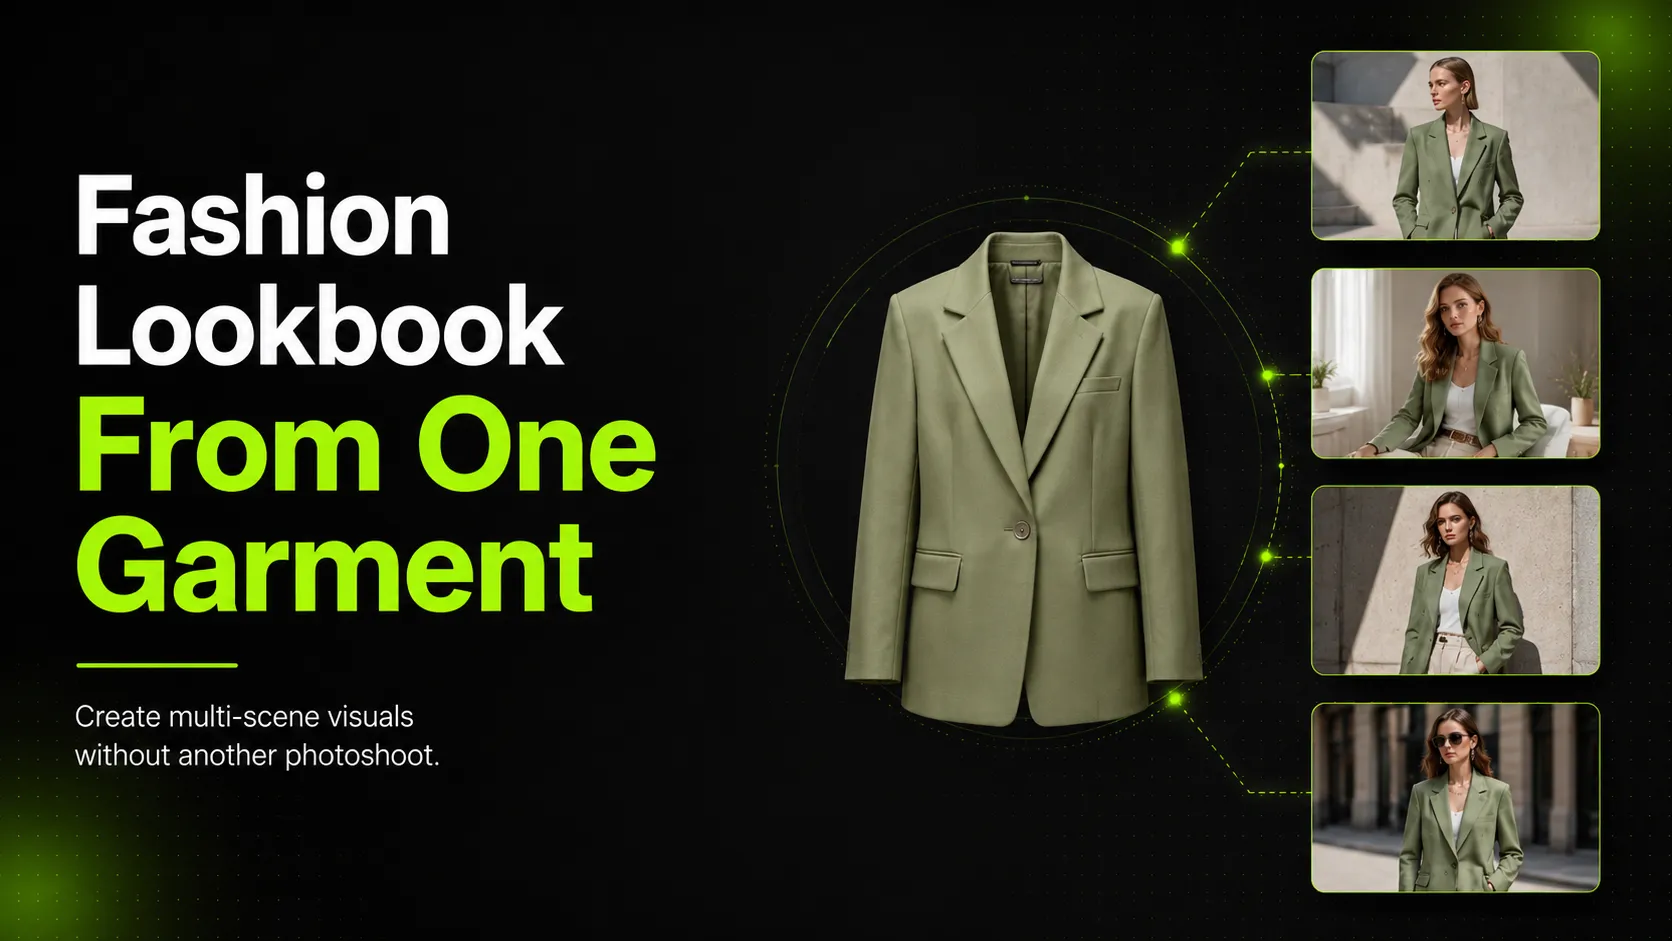
Fashion brands rarely need just one product image.
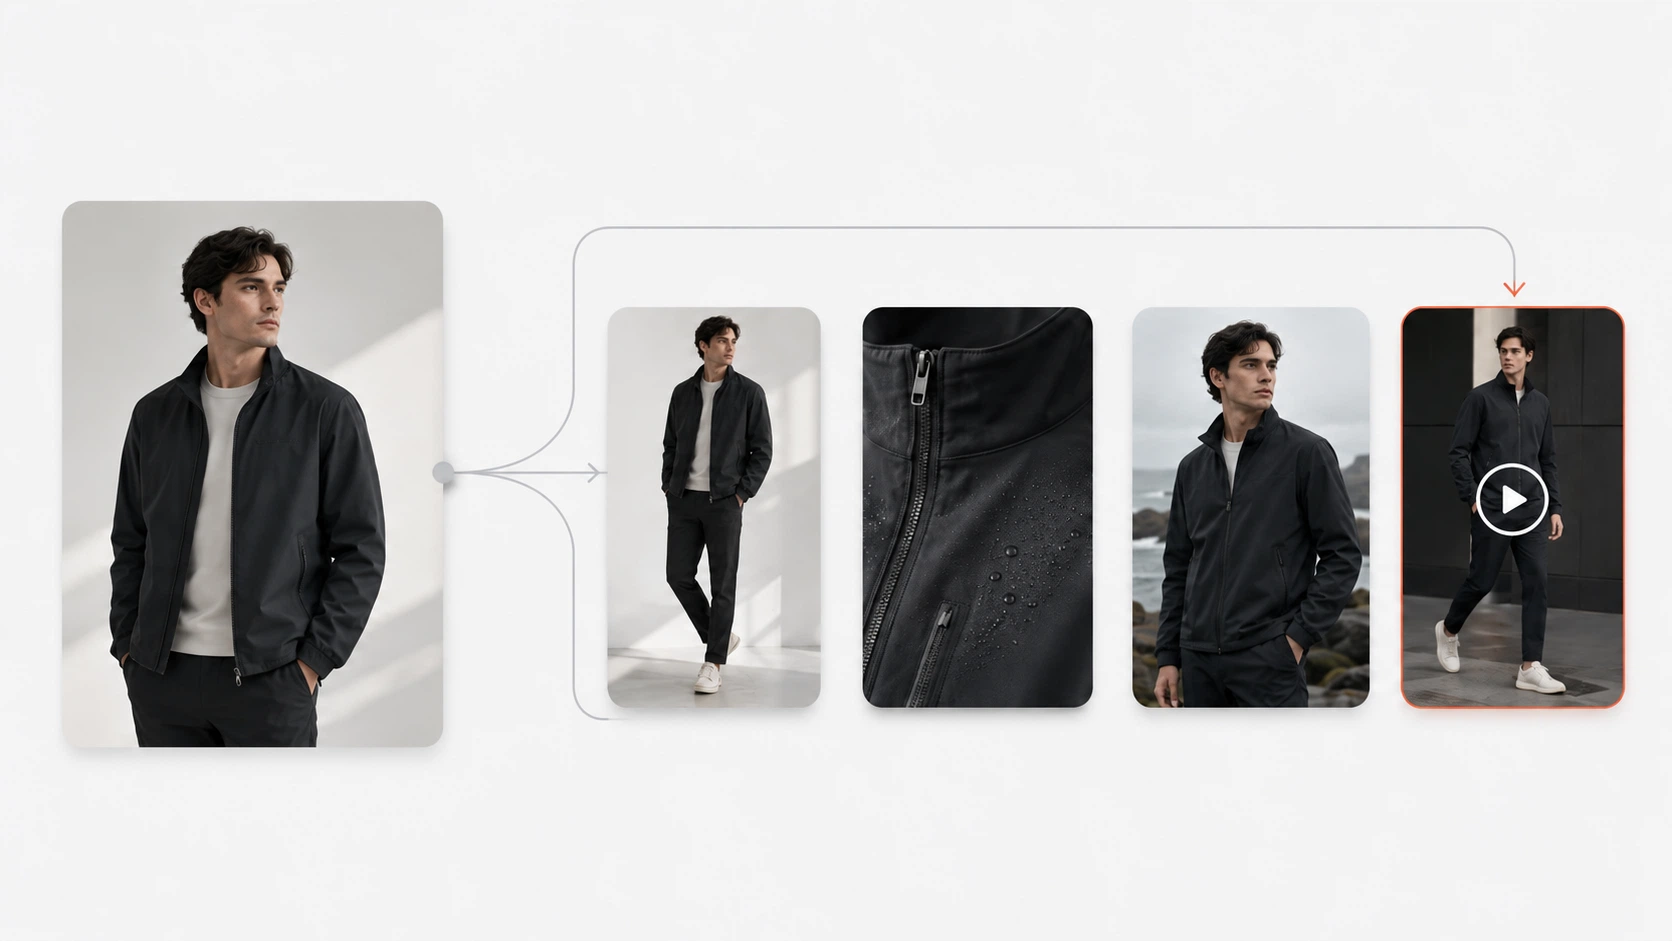
A single garment may need a clean product page image, a model styling shot, a campaign scene, a social crop, a detail image, and a seasonal lookbook visual. For a small team, creating all of that through traditional photography can mean another model booking, another studio setup, another styling round, and another editing cycle.
That is where AI-assisted lookbook creation becomes useful.
The goal is not to create random fashion images. The goal is to take one strong garment reference and build a multi-scene visual set that still tells the truth about the product.
A good fashion lookbook should do three things:
Introduction
- Show the garment clearly
- Help shoppers imagine how it fits into a lifestyle or collection
- Keep product details accurate across every scene
This guide explains how to turn one garment image into a multi-scene fashion lookbook without another full photoshoot. It covers the image types you need, how to plan scenes, where AI can help, where it can go wrong, and how to review the final visuals before publishing.
Start With the Right Expectation
“One garment image” does not mean “any image will work.”
A blurry mirror selfie, a wrinkled flatlay, or a cropped product photo will not give you reliable lookbook results. AI tools can expand an image, but they still depend on the quality of the reference.
The better way to think about the process is this:
One garment image can start the workflow. Better reference images make the lookbook more accurate.
At minimum, use a clean main garment image. If possible, also prepare a detail image and a back-view image. These extra references help protect important garment features such as collar shape, fabric texture, logo placement, print position, cut, and back details.
This matters because the biggest risk in AI fashion visuals is not that the image looks bad. The bigger risk is that it looks good but changes the product.
A dress may become shorter. A jacket may lose its pocket details. A printed shirt may shift the pattern. A logo may become unreadable. A backless design may be shown as a closed back. These are not small errors for ecommerce; they can mislead customers.
So before generating any lookbook scene, start with product truth.
What a Multi-Scene Fashion Lookbook Should Include
A lookbook is not just a gallery of pretty images. For ecommerce, it should support real selling moments.
Here is a practical structure:
| Scene Type | Purpose | Best Use |
|---|---|---|
| Clean product scene | Shows the garment clearly | PDP, marketplace, product listing |
| On-model styling scene | Shows fit, proportion, and outfit context | PDP, lookbook, collection page |
| Lifestyle scene | Shows mood, occasion, and customer lifestyle | Social, email, campaign page |
| Detail scene | Shows fabric, trim, collar, logo, or cut | PDP, product detail section |
| Seasonal campaign scene | Connects the garment to a drop or collection story | Landing page, ads, hero image |
| Social crop | Creates quick, channel-specific visual variations | Instagram, Pinterest, TikTok cover, paid social |
You do not need all six scenes for every product. A hero garment in a new collection may deserve the full set. A simple restock item may only need a clean product image, one model scene, and one social crop.
The best lookbook workflow starts by deciding which scenes the garment actually needs.
Step 1: Prepare the Input Image
Before using any AI tool, prepare the garment reference.
Your main image should have:
- Clear lighting
- Accurate color
- Full garment shape visible
- Minimal distortion
- No heavy filters
- No confusing background elements
- Enough resolution for details
- No cropped sleeves, hems, or important trims
If the garment has important details, prepare additional references:
| Reference Image | Why It Helps |
|---|---|
| Main image | Gives the tool the overall garment shape, color, and front structure |
| Detail image | Helps preserve fabric, collar, trims, print, logo, buttons, seams, or texture |
| Back-view image | Helps preserve back design, cuts, closures, straps, and rear silhouette |
For example, if you are creating a lookbook for a printed blouse, the detail image matters. If you are creating a lookbook for a dress with a special back cut, the back-view image matters. If you only provide the front view, the AI may guess the back design.
Do not skip this step. Good input images reduce cleanup later.
Step 2: Choose the Lookbook Direction
Before generating scenes, decide the story.
A lookbook should not feel like six unrelated images. It should have a consistent direction.
Ask:
- Is this garment part of a summer, fall, resort, workwear, evening, or streetwear collection?
- Should the mood feel clean, editorial, casual, premium, minimal, urban, romantic, sporty, or relaxed?
- Is the visual goal product clarity, campaign storytelling, or ad testing?
- Should the garment appear on model, in detail, in motion, or in a styled scene?
- Which channels will use the final images?
A simple direction might be:
Minimal spring lookbook for a linen shirt, with neutral backgrounds, soft daylight, relaxed styling, and clean PDP-friendly crops.
A stronger direction prevents the lookbook from becoming a random image batch.
Step 3: Generate the Core Lookbook Scenes
Once the input and direction are clear, generate the first set of scenes.
A practical starter set looks like this:
- One clean product-focused image
- Two on-model styling images
- One lifestyle scene
- One detail-focused image
- One social crop or campaign variation
That gives you a useful six-image lookbook without overproducing.
This is where an AI workflow can reduce production time. For fashion teams that already have a usable product reference, an AI Fashion Lookbook Generator can help turn the garment into multiple editorial-style lookbook views while using references to guide garment consistency.
Use AI to create controlled variations, not endless outputs.
A good first batch may be 6–12 images. From there, select the best 3–6. If you generate 80 images without a review system, you create more work for yourself.
Step 4: Build On-Model and Pose Variety Carefully
On-model scenes are often the most useful part of a fashion lookbook because they help shoppers understand scale, fit, proportion, and styling.
But they are also where AI mistakes become more visible.
Check:
- Does the garment fit naturally?
- Has the sleeve length changed?
- Are shoulders, waist, and hemline accurate?
- Does the fabric hang in a believable way?
- Does the pose distort the product?
- Is the model making the garment look tighter, looser, longer, or shorter than it really is?
For brands that need more model variety or pose options, an AI Pose Generator can fit into this part of the workflow. It is most useful when you want to explore pose variations without organizing another shoot.
Use pose generation for variety, but do not let pose variety override product truth.
If a pose makes the garment look better than it actually is, do not publish that image as a product page visual. It may still work as a mood reference or campaign concept, but not as a product-accuracy image.
Step 5: Add Detail Scenes for Ecommerce Trust
A lookbook should not only show mood. It should help buyers understand the product.
Detail scenes are especially important for:
- Fabric texture
- Collar shape
- Print placement
- Embroidery
- Logo details
- Buttons or zippers
- Pockets
- Stitching
- Back design
- Hem or sleeve finish
These images are useful for PDPs, email modules, and product explanation sections.
If you need more ecommerce-focused detail visuals, an AI Fashion Detail Image Generator can support product detail image workflows such as fabric close-ups, white-background product visuals, and apparel detail shots.
Detail images should be reviewed more strictly than lifestyle scenes. A slightly stylized background may be acceptable for a social post. A wrong fabric texture is not acceptable for a product detail image.
Step 6: Turn Lookbook Scenes Into Channel Assets
A multi-scene lookbook becomes more valuable when each image has a job.
Do not publish the same image everywhere without thinking about context.
Use this mapping:
| Channel | Best Lookbook Image Type | Notes |
|---|---|---|
| PDP | Clean product image, on-model image, detail image | Prioritize product accuracy |
| Collection page | On-model styling, campaign scene | Keep mood consistent |
| Detail image, campaign crop, hero image | Use strong visual hierarchy | |
| Paid social | Lifestyle scene, social crop, pose variation | Test multiple hooks |
| Instagram / Pinterest | Lifestyle, editorial, close-up | Prioritize mood and shareability |
| Landing page | Seasonal campaign scene, lookbook set | Tell a collection story |
For broader campaign production, an AI Product Photography tool can help generate ecommerce product images, campaign visuals, and social creatives from reference images and prompts. Use it when the visual need goes beyond the lookbook itself and into product pages, ads, or campaign assets.
Step 7: Review Every Image Before Publishing
This is the most important step.
AI lookbook images can look polished while still being wrong. A professional-looking image is not automatically publishable.
Use this checklist.
Garment QA
- Does the garment shape match the original?
- Are fit, length, neckline, sleeves, hem, and waist accurate?
- Are fabric texture and weight believable?
- Are prints, logos, and patterns in the right place?
- Are buttons, zippers, seams, pockets, and trims correct?
- Does the back view match the real garment?
- Does the image exaggerate the garment’s shape or fit?
Model QA
- Does the model pose look natural?
- Do hands, arms, shoulders, and legs look realistic?
- Does the garment interact naturally with the body?
- Does the pose create misleading fit?
- Does the model styling match the brand?
Scene QA
- Does the background support the garment?
- Is lighting consistent across the lookbook?
- Does the scene match the collection story?
- Is the crop suitable for the channel?
- Is the image sharp enough for ecommerce use?
- Does the full lookbook feel consistent?
Customer Trust QA
Ask one final question:
If a customer buys this garment after seeing this image, will they feel misled?
If the answer might be yes, do not publish the image as a product or PDP asset.
Which Scenes Are Safest for AI?
Not every image type carries the same risk.
| Image Type | AI Fit | Why |
|---|---|---|
| Campaign mood scene | Strong | Mood and styling matter more than exact technical detail |
| Social crop | Strong | Useful for variation and testing |
| PDP support image | Good with QA | Must preserve product accuracy |
| On-model pose variation | Good with QA | Fit and proportion need careful review |
| Detail image | Use carefully | Fabric and trims must be accurate |
| Main product truth image | Use carefully | Should match the real garment closely |
| Luxury hero campaign | Limited | Brand control and fine detail matter |
| Fit-sensitive product image | Risky | Inaccurate fit can increase customer distrust |
A practical rule:
Use real photography or approved product references for truth. Use AI to expand scenes, poses, styling, crops, and campaign variations.
Cost and Efficiency: Measure Approved Images, Not Generated Images
The wrong way to measure AI lookbook production is by the number of images generated.
The better metric is:
Cost per Approved Visual = Total Workflow Cost ÷ Approved, Publishable Images
For example:
| Scenario | Generated Images | Approved Images | Result |
|---|---|---|---|
| Controlled workflow | 24 | 12 | Efficient review and good select rate |
| Random generation | 100 | 10 | More waste and more review time |
| Strong references | 30 | 18 | Better garment consistency |
| Weak references | 60 | 8 | More distortion and cleanup |
A lower generation cost does not matter if your team spends hours rejecting bad outputs.
The goal is not to create as many images as possible. The goal is to create enough approved visuals for product pages, social, ads, and campaign storytelling.
Common Mistakes to Avoid
Mistake 1: Treating one image as enough for every detail
One main image can start the workflow, but detail and back-view references improve accuracy.
Mistake 2: Generating scenes before planning the lookbook
Without a direction, the output feels random. Decide the season, mood, audience, and channel first.
Mistake 3: Ignoring garment truth
A beautiful lookbook image that changes the product is not a good ecommerce asset.
Mistake 4: Using every output
A lookbook should be curated. Publish the best images, not the most images.
Mistake 5: Using AI for every visual
Some images still need real capture, especially luxury hero shots, complex fabric details, or fit-sensitive products.
Mistake 6: Forgetting channel requirements
A vertical social crop, a PDP image, and a campaign hero image are not the same asset. Generate and crop with the final channel in mind.
A Practical Workflow Example
A small fashion brand has one clean product image of a cropped jacket. The team wants a mini lookbook for a new drop.
A practical workflow could look like this:
- Prepare a front image, detail image of the fabric and zipper, and back-view image.
- Choose a visual direction: urban fall styling, neutral background, natural daylight.
- Generate a clean product-focused image for the PDP.
- Generate two on-model looks with different poses.
- Generate one lifestyle image for social and email.
- Generate one detail crop focused on zipper and fabric.
- Review all outputs for garment shape, sleeve length, zipper placement, fabric texture, and back details.
- Approve 4–6 images.
- Export by channel: PDP, collection page, Instagram, email, ad test.
- Track which image drives the best engagement or conversion.
This workflow gives the brand a usable mini lookbook without rebuilding a full shoot.
FAQ
Final Takeaway
Turning one garment image into a multi-scene fashion lookbook is not about generating random fashion images.
It is about building a useful visual system from one approved product reference.
Start with a clean garment image. Add detail and back-view references when possible. Plan the lookbook scenes before generating. Create a controlled batch. Review every image for garment truth. Then publish only the visuals that support your product page, campaign, social, or ad goals.
AI can reduce the need for repeated shoots, but it should not remove the responsibility to show the garment honestly.
The strongest workflow is simple:
Use real references for product truth. Use AI to expand the story.