



Introduction: The Real Cost Is Not the Price per Photo
Most ecommerce brands ask the wrong question.
They ask:
"How much does a product photo cost?"
A better question is:
"How much does it cost to create a complete set of accurate, usable, conversion-ready product images for each SKU?"
That difference matters.
A photographer may quote \$40 for a simple white-background product photo. But that image may still require product preparation, shipping, retouching, file resizing, naming, review time, usage rights, and revisions before it becomes something your team can actually publish.
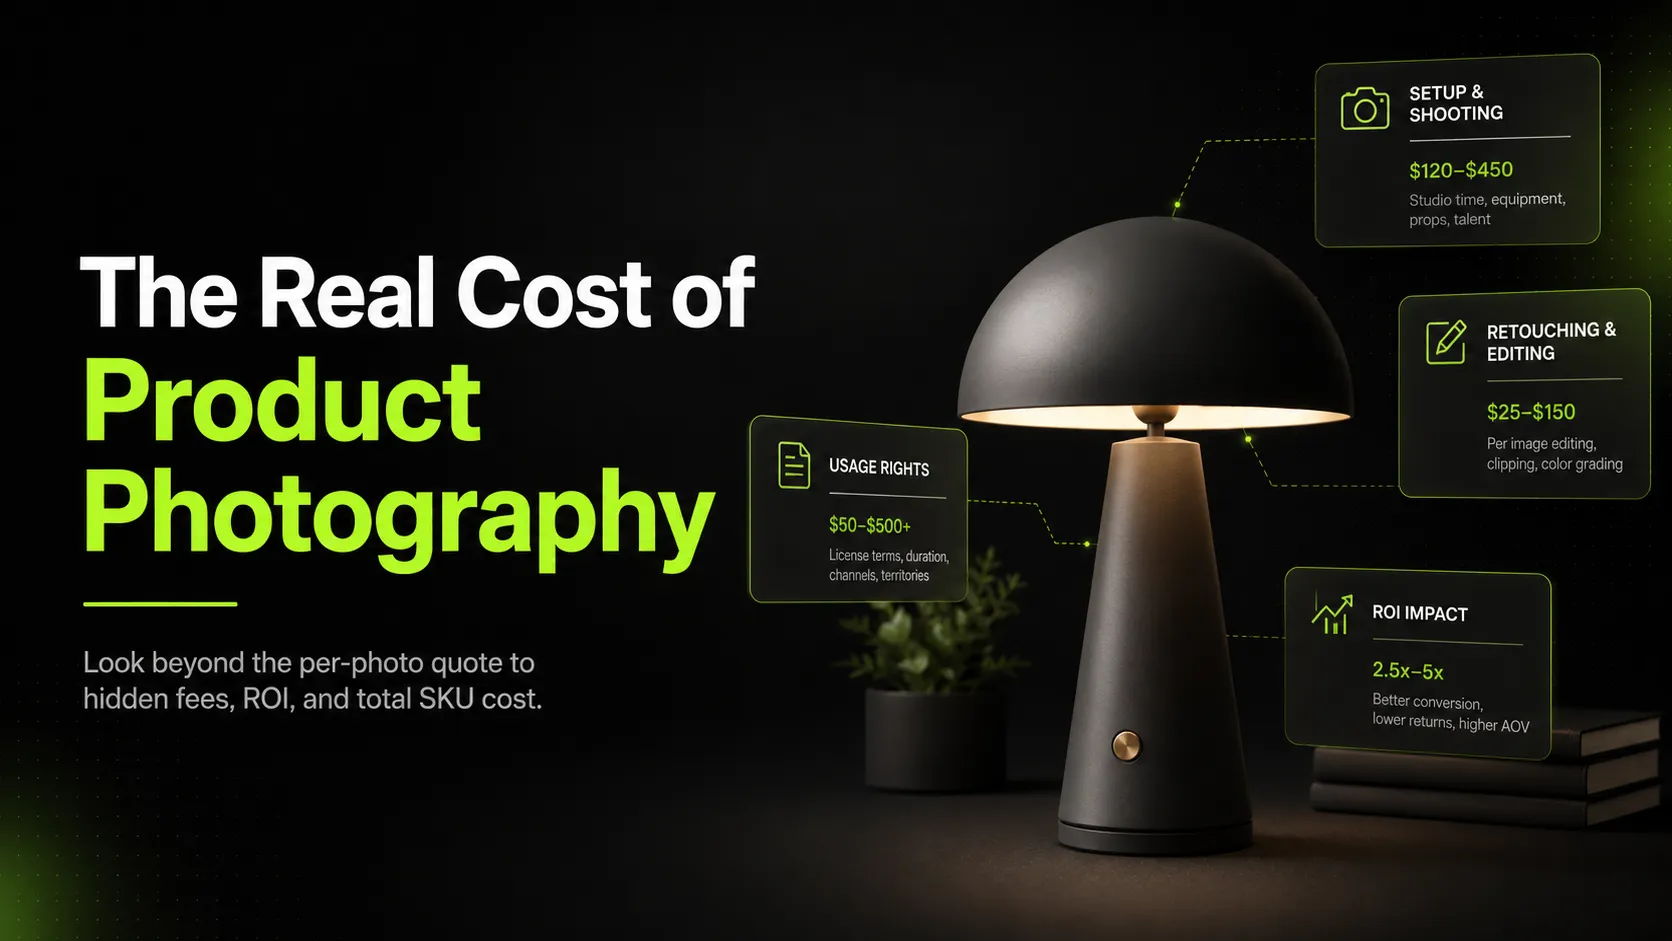
The real cost of product photography is not the invoice alone. It is the total cost of producing product visuals that are clear, accurate, channel-ready, and useful enough to help shoppers make a buying decision.
This guide breaks down product photography costs in 2026, including typical pricing ranges, hidden fees, SKU-level budget examples, ROI formulas, and smarter workflows for reducing costs without lowering image quality.
What Product Photography Really Costs
Product photography pricing depends on the type of image, the complexity of the product, the production setup, the number of SKUs, the required usage rights, and the amount of post-production.
A simple white-background product shot is usually much cheaper than a lifestyle image with props, models, custom lighting, and creative direction. A single product image may cost very little in a high-volume catalog shoot, while a campaign hero image may cost hundreds or thousands of dollars once production is included.
Here is a practical baseline:
| Image Type | Typical Use Case | Common Cost Range | Notes |
|---|---|---|---|
| White-background product photo | Amazon, Shopify, catalog, PDP main image | \$25-\$75 per image | Usually cheaper when shot in volume |
| Standard ecommerce gallery image | Angles, close-ups, packaging, detail shots | \$40-\$150 per image | Often sold as SKU packages |
| Lifestyle product photo | Website banners, PDP gallery, ads, social media | \$100-\$500+ per image | Props, styling, models, and location increase cost |
| Fashion / apparel image | Flat lay, ghost mannequin, on-model images | \$25-\$300+ per image | Pricing depends heavily on model and styling needs |
| 360-degree / 3D product visual | Premium PDPs, interactive product views | \$150-\$1,200+ per product | Useful for complex or high-value products |
| Campaign hero image | Landing pages, seasonal campaigns, paid ads | \$500-\$5,000+ per shoot | Usually includes creative direction and production |
These numbers are useful, but they are only the starting point.
The mistake many brands make is budgeting by isolated image price. In ecommerce, you rarely need just one product image. You need a complete asset set.
A real SKU may need:
- One marketplace-compliant main image
- Several product page gallery images
- Close-ups and detail shots
- Packaging images
- Scale or in-use images
- Lifestyle visuals
- Social media versions
- Ad creatives
- Seasonal campaign images
- Cropped and resized versions for different channels
That is why the better budgeting unit is not "cost per image." It is \*\*cost per usable SKU asset set\*\*.
Why the Quoted Price Is Not the Real Price
The quoted price usually covers only part of the work. A photographer's invoice may include shooting and basic editing, but it may not include everything required to turn raw production into finished ecommerce assets.
A more realistic formula looks like this:
True Product Photography Cost =
Shoot Fees
\+ Studio / Location
\+ Props / Styling / Models
\+ Product Shipping
\+ Product Prep
\+ Retouching
\+ Revisions / Reshoots
\+ Usage Rights
\+ Internal Team Time
Pre-production Costs
Before the camera comes out, someone has to define what needs to be shot.
This includes:
- Product selection
- Creative brief
- Mood board
- Shot list
- Competitor references
- Channel requirements
- Product sample preparation
- Approval from marketing, ecommerce, brand, or founder teams
Pre-production is often invisible because it happens inside the company. But if a founder, marketer, or ecommerce manager spends six hours preparing the shoot, that time is part of the real cost.
Production Costs
Production costs include the visible parts of the shoot:
- Photographer
- Studio
- Assistant
- Lighting
- Props
- Stylist
- Model
- Location
- Set design
- Equipment rental
Simple white-background catalog work may only need a controlled studio setup. Lifestyle images may require a location, props, talent, art direction, and more time per shot.
That is why lifestyle photography often costs much more than standard product photography. You are not only paying for a picture. You are paying for a scene.
Post-production Costs
Post-production can be basic or complex.
Basic editing includes exposure correction, color correction, cropping, background cleanup, shadow adjustment, and file export.
More advanced retouching covers dust and scratch removal, label cleanup, skin retouching, ghost mannequin editing, compositing, reflection control, background replacement, and color matching across variants.
Post-production becomes especially important when products must look consistent across a catalog. A small color mismatch may not matter in isolation, but across 200 SKUs it can make a store look unprofessional.
Revision and Reshoot Costs
Revisions are one of the most common hidden costs.
A shoot becomes more expensive when:
- The product was not cleaned or prepared properly
- The wrong angle was captured
- The image does not meet marketplace requirements
- The background does not match the brand
- The product color looks inaccurate
- The image is not sharp enough for zoom
- The team changes direction after the shoot
- A rushed deadline requires priority editing
The most expensive product photo is not the one with the highest quote. It is the one you pay for twice because the first version was unusable.
Usage Rights and Licensing
Commercial usage rights can also affect cost. Some photographers or agencies price differently depending on where and how the image will be used. A product photo used only on a website may not carry the same licensing terms as an image used in paid advertising, print campaigns, retail packaging, or global campaigns.
Before approving a quote, ask:
- Can we use the images on our website?
- Can we use them on marketplaces?
- Can we use them in paid ads?
- Can we use them in email campaigns?
- Can we use them internationally?
- Is usage limited by time?
- Can we crop, edit, or repurpose the images?
If these terms are unclear, the brand may face extra fees later.
Internal Team Costs
Internal coordination is easy to ignore.
But every shoot requires time from people inside the business:
- Writing the brief
- Sending samples
- Reviewing proofs
- Giving feedback
- Managing revisions
- Naming and organizing files
- Uploading images to Shopify, Amazon, or the CMS
- Checking final image quality
If an ecommerce manager earning \$50 per hour spends 12 hours managing a shoot, that is \$600 of internal cost. It may not appear on the photographer's invoice, but it is still part of the real project cost.
The Better Metric: Cost per Usable Image
The most useful product photography metric is not cost per delivered file. It is \*\*cost per usable image\*\*.
Use this formula:
Cost per Usable Image =
Total Project Cost ÷ Approved Publishable Images
For example:
Total shoot cost: \$3,000
Raw images delivered: 120
Approved publishable images: 30
<br/>Cost per delivered image: \$25
Cost per usable image: \$100
The first number looks cheap. The second number is the one that matters.
This is where many product photography budgets go wrong. A team may feel good because it received 120 files, but if only 30 become live assets, the real cost is much higher.
A usable image should be:
- Accurate to the real product
- Sharp enough for the intended channel
- Properly cropped
- Consistent with the brand
- Correctly exported
- Compliant with platform requirements
- Approved by the team
- Actually published or used in campaigns
If an image sits unused in a folder, it is not a business asset. It is production waste.
Product Photography Cost by SKU and Brand Size
Product photography costs become easier to understand when you model them by SKU.
Different brands need different image systems. A 20-SKU startup should not budget like a 500-SKU catalog brand. A scaling ecommerce brand should not treat every seasonal visual as a full studio shoot.
Small Brand Example: 20 SKUs
Assume each SKU needs:
- 1 main image
- 3 gallery images
- 1 lifestyle image
That creates:
20 SKUs × 5 images = 100 usable images
For a small brand, the goal is not to create a huge visual library. The goal is to make sure every product has enough clear images to reduce buyer uncertainty.
Recommended workflow:
- Use DIY or affordable studio photography for simple product shots
- Invest more in best-selling or high-margin products
- Avoid overproducing campaign visuals before validating demand
- Use lifestyle images selectively where context matters
- Build a repeatable shot list from the beginning
Strategic advice: do not reshoot your entire catalog before you know which SKUs deserve the investment. A small brand should prioritize clarity, consistency, and product-market learning.
Growing Brand Example: 100 SKUs
Assume each SKU needs:
- 1 main image
- 4 gallery images
- 2 lifestyle or social variations
That creates:
100 SKUs × 7 images = 700 usable images
At this stage, production complexity increases quickly.
The brand now needs:
- Consistent backgrounds
- Standardized angles
- Repeatable naming rules
- Channel-specific exports
- More lifestyle and campaign assets
- Faster refresh cycles for ads and social media
Recommended workflow:
- Use studio photography for core SKU assets
- Batch similar products together
- Create a reusable shot list by product type
- Standardize lighting, crop, shadow, and export rules
- Use scalable workflows for seasonal, social, and ad variations
Strategic advice: at 100 SKUs, consistency matters more than one-off creativity. The brand should not reinvent the shoot every time. It should create a system.
Scaling Brand Example: 500+ SKUs
A scaling brand may need each SKU to support:
- Marketplace main image
- PDP gallery
- Detail shots
- Packaging shots
- Lifestyle image
- Seasonal version
- Paid social version
- Email image
- Landing page crop
- Retargeting creative
At 500 SKUs, this can easily become thousands of visual assets.
Recommended workflow:
- Centralize visual asset management
- Create category-level shot lists
- Track cost per usable image
- Build a QA checklist
- Separate core product capture from creative variations
- Use hybrid production systems
- Reuse approved assets across channels when possible
Strategic advice: at scale, the biggest cost is no longer the price of a single image. It is bottlenecks, inconsistency, rework, and unused assets. The larger the catalog, the more important process becomes.
Product Photography Costs Change by Channel
A product photo is not just a product photo. The required image changes depending on where it will be used.
A single shoot should be planned around channel needs from the start. Otherwise, the brand pays once for the shoot and again for resizing, editing, adapting, or reshooting missing formats.
Amazon and Marketplaces
Marketplace images need clarity and compliance.
Amazon main images typically require a clean product-focused presentation, and sellers need to follow official product image requirements. The image must help customers evaluate the product and should not misrepresent what is being sold.
Marketplace planning should consider:
- Main image requirements
- White-background needs
- Image resolution
- Product size in frame
- Variant images
- Packaging images
- Infographics where allowed
- Mobile visibility
- Suppression risk from non-compliant images
The cost risk is not only "bad-looking photos." It is paying for images that cannot be used.
Shopify and DTC Stores
Shopify and DTC stores need more than compliance. They need trust.
A strong product page gallery usually includes:
- Main product image
- Multiple angles
- Close-up details
- Scale or in-use image
- Packaging or bundle image
- Lifestyle context
- Texture or material detail
- Variant images
The goal is to help shoppers understand what they will receive.
Good product photography can make an online store look more professional and help customers trust the brand. Poor photography can make even a good product feel risky.
Paid Social and Ads
Paid social has a different cost problem: variation.
One polished hero image is not enough. Ad teams often need many testable versions:
- Different backgrounds
- Different crops
- Different hooks
- Seasonal versions
- Product-in-use visuals
- Offer-led creative
- UGC-style concepts
- Retargeting visuals
- Bundle images
For ads, the cost bottleneck is not always the first image. It is producing enough variations to test without turning every new concept into a full shoot.
Email and Landing Pages
Email and landing pages need flexible campaign assets.
A launch campaign may require:
- Hero banner
- Product close-up
- Bundle image
- Before/after visual
- Seasonal image
- Comparison image
- Social proof image
- Retargeting crop
If these needs are not planned before production, the brand may end up stretching one image across too many placements.
That usually leads to weak crops, inconsistent visuals, or last-minute design work.
Studio vs DIY vs AI-Assisted Product Photography
The smartest question is not:
"Which workflow is cheapest?"
The better question is:
"Which image type deserves which workflow?"
Different visuals have different risk levels. A main image for a high-volume marketplace listing should be treated differently from a seasonal Instagram background. A luxury hero image should be treated differently from a batch of ad testing creatives.
| Workflow | Best For | Weakness | Cost Logic |
|---|---|---|---|
| Professional studio photography | Hero images, premium campaigns, complex products, reflective or transparent materials | Expensive and slower to scale | High fixed cost, strong quality control |
| DIY product photography | Early-stage brands, simple white-background images, small catalogs | Time-consuming, inconsistent quality | Low cash cost, high internal time cost |
| AI-assisted product photography | Lifestyle variations, seasonal backgrounds, social ads, secondary PDP images | Requires QA and product accuracy review | Lower marginal cost for variations |
| Hybrid workflow | Growing ecommerce brands that need quality and scale | Requires process discipline | Studio for core assets, scalable workflows for variations |
This is where many brands can reduce costs without reducing quality.
They should not use the same production method for every image. They should assign the right workflow to the right job.
When to Use Professional Photography
Professional photography still matters.
Use studio or professional production when physical accuracy, brand perception, or technical control is critical.
Professional photography is usually the better choice for:
- Main product images
- Luxury product pages
- Hero campaign images
- Reflective products
- Transparent products
- Jewelry
- Cosmetics packaging
- Apparel fit
- Furniture scale
- Complex textures
- Regulatory or claim-sensitive products
- Images where exact product representation matters
For these images, the cost of being wrong is high.
If the product shape, color, label, fit, or material is inaccurate, shoppers may lose trust. In some categories, inaccurate visuals can also increase returns or create compliance risks.
A professional shoot can be expensive, but for core assets, it may be worth the control.
When AI-Assisted Product Photography Makes Financial Sense
AI-assisted product photography makes the most financial sense when the bottleneck is \*\*variation\*\*, not physical product capture.
It is especially useful for:
- Background variations
- Seasonal campaign images
- Secondary PDP images
- Social media posts
- Paid ad creative testing
- Email visuals
- Lifestyle concepts
- Batch visual variations
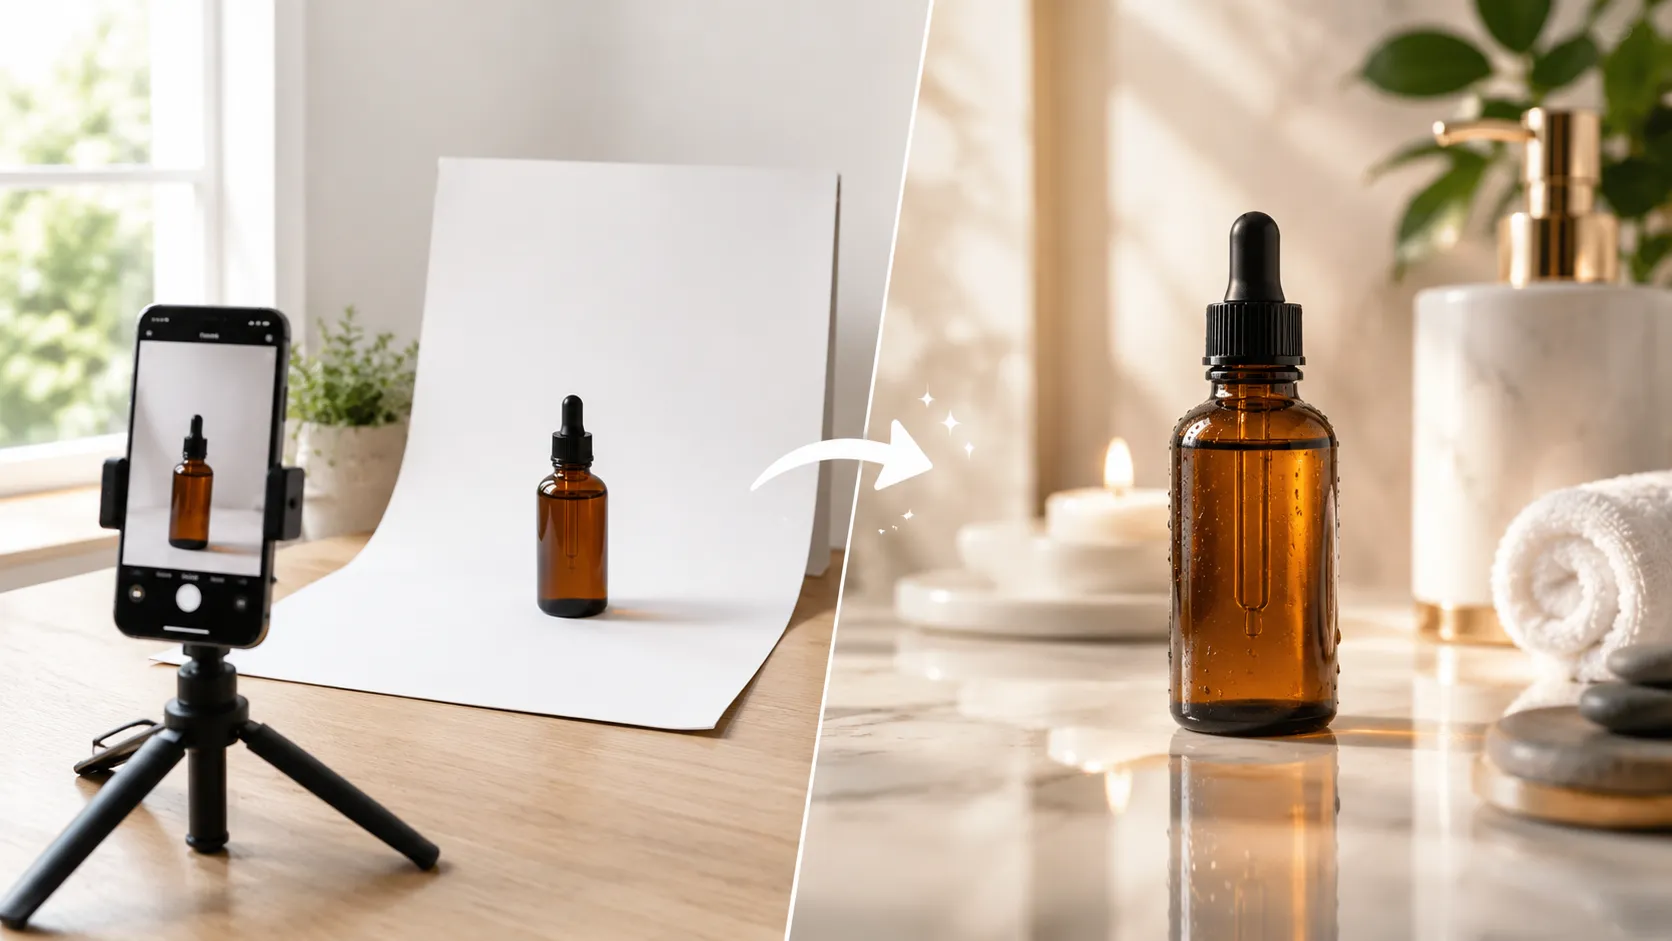
For example, a skincare brand may already have clean product shots. Instead of booking a full lifestyle shoot for every new campaign concept, the team may use AI-assisted workflows to create visual variations for testing.
This does not mean replacing all photography. It means separating image types by risk.
High-risk images still need strong control. Lower-risk variations can often be produced more efficiently.
The best use case for AI-assisted product photography is not "make one perfect product photo." It is:
"Create more useful visual options from existing product assets, then review and test them."
This is also where tools like iCreat AI can fit naturally. For teams that already have clean product references, iCreat AI can help create lifestyle scenes, background variations, and campaign visuals from existing product assets.
For a deeper workflow, see this guide on how to \generate lifestyle product images from one product photo.
How to Calculate Product Photography ROI
Product photography should not be judged only by cost. It should be judged by whether it improves commercial performance.
Useful metrics include:
- Conversion rate
- Click-through rate
- Add-to-cart rate
- Return rate
- Cost per acquisition
- Revenue per visitor
- Cost per usable image
- Ad creative performance
- Product page engagement
A simple ROI formula is:
Photography ROI =
(Incremental Profit from Better Images - Photography Investment)
÷ Photography Investment
A simpler revenue model is:
Incremental Revenue =
Traffic × Conversion Rate Lift × Average Order Value
Here is an example:
Monthly PDP sessions: 50,000
Current conversion rate: 2.0%
Average order value: \$65
<br/>Current monthly orders:
50,000 × 2.0% = 1,000 orders
<br/>Current monthly revenue:
1,000 × \$65 = \$65,000
Now assume improved product images increase conversion from 2.0% to 2.2%.
New monthly orders:
50,000 × 2.2% = 1,100 orders
<br/>New monthly revenue:
1,100 × \$65 = \$71,500
<br/>Incremental monthly revenue:
\$71,500 - \$65,000 = \$6,500
If the image upgrade costs \$4,000, the payback period may be less than one month before margin adjustment.
But this is not a guaranteed result. The purpose of the model is not to promise a lift. It is to help brands understand what lift would be needed to justify the investment.
Before spending, ask:
- Which products receive enough traffic to justify better images?
- Which products have high margins?
- Which products have high return rates?
- Which products are currently underperforming despite strong traffic?
- Which images can be tested?
- What is the minimum conversion lift needed to break even?
A brand should not improve images blindly. It should improve the images most likely to change buyer behavior.
How to Reduce Product Photography Costs Without Lowering Quality
Reducing product photography cost does not mean choosing the cheapest vendor. It means reducing waste, rework, and unnecessary production.
Start with High-Impact SKUs
Do not reshoot the entire catalog first.
Start with products that have:
- High traffic
- High margin
- High ad spend
- High return rates
- Strong search demand
- Poor existing images
- Strategic importance to the brand
This gives the brand a better chance of seeing measurable impact.
Create a Repeatable Shot List
A shot list prevents confusion.
Define what every SKU needs before production starts:
- Main image
- Front angle
- Side angle
- Back angle
- Detail close-up
- Texture or material image
- Scale image
- Packaging image
- Lifestyle image
- Variant image
- Campaign image
A clear shot list reduces revisions and reshoots.
Batch Similar Products Together
Batching reduces setup time.
Group products by:
- Size
- Shape
- Material
- Lighting needs
- Background
- Category
- Required angles
- Styling needs
A jewelry shoot, skincare shoot, and furniture shoot should not be planned the same way. But within each category, consistency can make production much more efficient.
Separate Core Images from Variation Images
Not every image deserves the same production cost.
Core images need accuracy and control:
- Main product image
- Detail image
- Packaging image
- Compliance-sensitive image
- High-traffic PDP image
Variation images need speed and testing volume:
- Seasonal backgrounds
- Social media images
- Paid ad concepts
- Email campaign visuals
- Secondary lifestyle images
This separation makes budgeting smarter.
A brand may use studio photography for core assets, then use an AI-assisted workflow to create scalable creative variations. For example, when a team needs to \create batch product image variations, the goal is not simply to create more files. The goal is to produce more useful test assets without booking a new shoot for every concept.
Build a Visual QA Checklist
Every image should pass a quality check before publishing.
Review:
- Product accuracy
- Color realism
- Label accuracy
- Logo clarity
- Product proportions
- Sharpness
- Resolution
- Edges
- Shadows
- Cropping
- Background consistency
- Marketplace requirements
- Brand consistency
- Mobile visibility
This is especially important for AI-assisted images. The output may look attractive, but it still needs to represent the product accurately.
A simple pre-publish checklist can prevent expensive mistakes. For more detail, see this \product photo quality checklist before publishing.
Track Cost per Usable Image
Always measure approved publishable images, not delivered files.
A vendor who delivers 300 images may not be cheaper if only 40 are usable. A workflow that produces fewer but more useful assets may have better economics.
Track:
- Total project cost
- Number of delivered files
- Number of approved images
- Number of published images
- Number of images used in ads
- Performance by image type
- Cost per usable image
This changes the conversation from "How cheap was the shoot?" to "How much value did the image system create?"
A 30-Day Product Photography Cost Reduction Plan
Here is a practical 30-day plan for reducing photography waste without lowering quality.
Days 1-3: Audit Your Current Images
Create a spreadsheet of active SKUs.
For each SKU, record:
- Number of current images
- Image types available
- Missing angles
- Missing detail shots
- Missing scale images
- Weak lifestyle images
- Outdated packaging
- Low-resolution files
- Inconsistent backgrounds
- Product page traffic
- Conversion rate
- Return rate
The goal is to find gaps before spending more money.
Days 4-7: Prioritize the Right Products
Do not improve everything at once.
Prioritize SKUs that are:
- High traffic
- High margin
- Frequently advertised
- Often returned
- Strategically important
- Visually weak compared with competitors
Then define required images by channel.
For example:
Amazon SKU:
Main image
Secondary angles
Infographic
Packaging image
Scale image
<br/>Shopify SKU:
Main image
Gallery images
Detail shots
Lifestyle image
Bundle image
<br/>Paid social:
Lifestyle variation
Seasonal variation
Offer-led creative
Retargeting image
This prevents overproduction.
Days 8-14: Produce or Improve Core Assets
Focus first on core product accuracy.
Actions:
- Shoot or clean main product images
- Standardize crop and background
- Capture required angles
- Create close-ups
- Check color accuracy
- Organize naming conventions
- Export correct file sizes
These assets become the foundation for everything else.
If the core product image is weak, every downstream image will be weaker too.
Days 15-21: Expand Creative Variations
Once core assets are strong, create variations.
This may include:
- Lifestyle backgrounds
- Seasonal images
- Ad creatives
- Email campaign visuals
- Social media versions
- Landing page hero crops
This is where AI-assisted workflows can reduce marginal production cost.
For example, a brand might use iCreat AI to create secondary campaign visuals from a clean product reference, then review the results for product accuracy, brand fit, and channel readiness.
For marketplace or storefront needs, you can also explore an \AI product photo generator for product listings.
Days 22-30: Test and Measure
Finally, measure performance.
Test:
- Product gallery order
- Main image options
- Lifestyle vs plain background
- Scale image vs no scale image
- Ad creative variations
- Seasonal backgrounds
- Bundle images
- Detail images
Track:
- CTR
- Conversion rate
- Add-to-cart rate
- Return rate
- CAC
- Revenue per visitor
- Cost per usable image
Then reinvest in the image types that actually improve performance.
The goal is not to create more images forever. The goal is to create better-performing visual assets with less waste.
Product Photography Budget Checklist
Use this checklist before planning your next shoot.
SKU and Asset Planning
- How many SKUs need new images?
- How many images does each SKU need?
- Which images are required for each channel?
- Which SKUs drive the most revenue?
- Which SKUs have the highest return rate?
- Which products are currently underperforming despite traffic?
Production Planning
- Do we have a shot list?
- Are similar products batched together?
- Are samples clean, complete, and ready?
- Do we need props, models, or styling?
- Are there reflective, transparent, or difficult materials?
- Do we need professional studio control?
Cost Planning
- What is included in the quote?
- Are retouching and color correction included?
- Are revisions included?
- Are usage rights included?
- Are exports and resizing included?
- Are rush fees possible?
- Who pays for shipping?
- How much internal team time is required?
QA Planning
- Who approves final images?
- What are the quality standards?
- Are product proportions accurate?
- Are colors realistic?
- Are logos and labels correct?
- Are images sharp enough for zoom?
- Are marketplace requirements met?
- Are images consistent across the catalog?
Performance Planning
- Which images will be tested?
- What baseline metrics will be used?
- How will conversion impact be measured?
- How will ad creative performance be tracked?
- What is the target cost per usable image?
Common Mistakes That Make Product Photography More Expensive
Mistake 1: Buying Images One at a Time
One-off image orders often cost more per asset and create inconsistent results.
Better approach: batch similar SKUs and plan image needs by channel.
Mistake 2: Not Creating a Shot List
Without a shot list, teams forget required angles, crops, and channel-specific needs.
Better approach: define every required image before production begins.
Mistake 3: Ignoring Internal Time
A cheap shoot can become expensive if it requires hours of coordination, feedback, and rework.
Better approach: include internal team time in the true cost calculation.
Mistake 4: Using Studio Shoots for Every Variation
Studio production is valuable, but not every background or ad concept needs a full shoot.
Better approach: reserve studio work for high-control assets and use scalable workflows for lower-risk variations.
Mistake 5: Publishing Images Without QA
A visually attractive image can still be wrong if the product details are inaccurate.
Better approach: review every image for product accuracy, resolution, compliance, and brand consistency.
Mistake 6: Measuring Delivered Files Instead of Usable Images
More files do not always mean more value.
Better approach: track cost per approved, publishable, used image.
Where iCreat AI Naturally Fits Into This Workflow
iCreat AI fits into this workflow after the brand has already defined its product image needs.
It should not replace the planning process. It should support the parts of the process where speed, variation, and scalable creative production matter most.
For brands that already have clean product references, iCreat AI can help create:
- Lifestyle product scenes
- Seasonal backgrounds
- Campaign visuals
- Social-ready product images
- Secondary PDP visuals
- Batch image variations
- Ad testing creatives
This is most useful when a team does not want to book a new shoot for every creative concept.
For example:
- A skincare brand can create multiple bathroom, vanity, or spa-inspired visuals from one clean product image.
- A fashion brand can generate seasonal lookbook-style concepts after core product photography is complete.
- A home goods brand can test different room settings before committing to a larger campaign direction.
- An ad team can produce multiple visual angles for testing without turning every ad idea into a studio project.
The important rule is this: use professional photography where precision matters most. Use AI-assisted workflows where variation, speed, and testing matter more.
AI-assisted images should still go through QA for:
- Product accuracy
- Color realism
- Label and logo clarity
- Proportions
- Resolution
- Cropping
- Brand consistency
- Channel requirements
If your team needs high-resolution visuals for multiple placements, make sure the workflow supports export quality suitable for zoom, cropping, and reuse. You can learn more about how to \export high-resolution product visuals.
FAQ
Conclusion: Stop Budgeting by Image. Start Budgeting by Visual System
The real cost of product photography is not the quote.
It is the total cost of creating accurate, usable, channel-ready visuals that help shoppers understand the product and make a purchase decision.
A cheap image is not cheap if it cannot be used. An expensive shoot may be worthwhile if it produces assets that improve conversion, reduce returns, and support multiple channels.
The smartest ecommerce brands do not ask only:
"How much does this product photo cost?"
They ask:
"Which product images do we need, which ones matter most, how will we produce them, and how will we measure whether they worked?"
That shift changes everything.
Use studio photography where control and accuracy matter most. Use DIY workflows where the product is simple and the team has time. Use AI-assisted tools where the goal is to create more useful variations without booking a new shoot for every background, campaign, or ad concept.
If your team already has clean product references and needs more lifestyle scenes, seasonal visuals, or ad-ready variations, iCreat AI can help you scale visual production without treating every new image as a full studio project.
\*\*CTA:\*\* Create product photo variations with iCreat AI.